Storyboard Generation
A Storyboard is the procedural plan of an XR simulation — the sequential, parallel and conditional steps a trainee must perform — expressed as a flow graph that can later be imported into a Creator SceneGraph. This is a solution to produce storyboard utilizing an LLM with natural-language procedure descriptions.
Storyboard Generation is a cloud feature delivered through two surfaces:
The ORamaVR Portal is where the storyboard lives end to end: you generate a draft from a procedure description (or import one from PDF), refine the visual graph in the Storyboard Editor, and walk it action by action on the Inspect Storyboard page to regenerate images and per-action fields.
The Creator SceneGraph is where the finished storyboard is imported from the cloud so it can drive the rest of the Creator authoring pipeline.
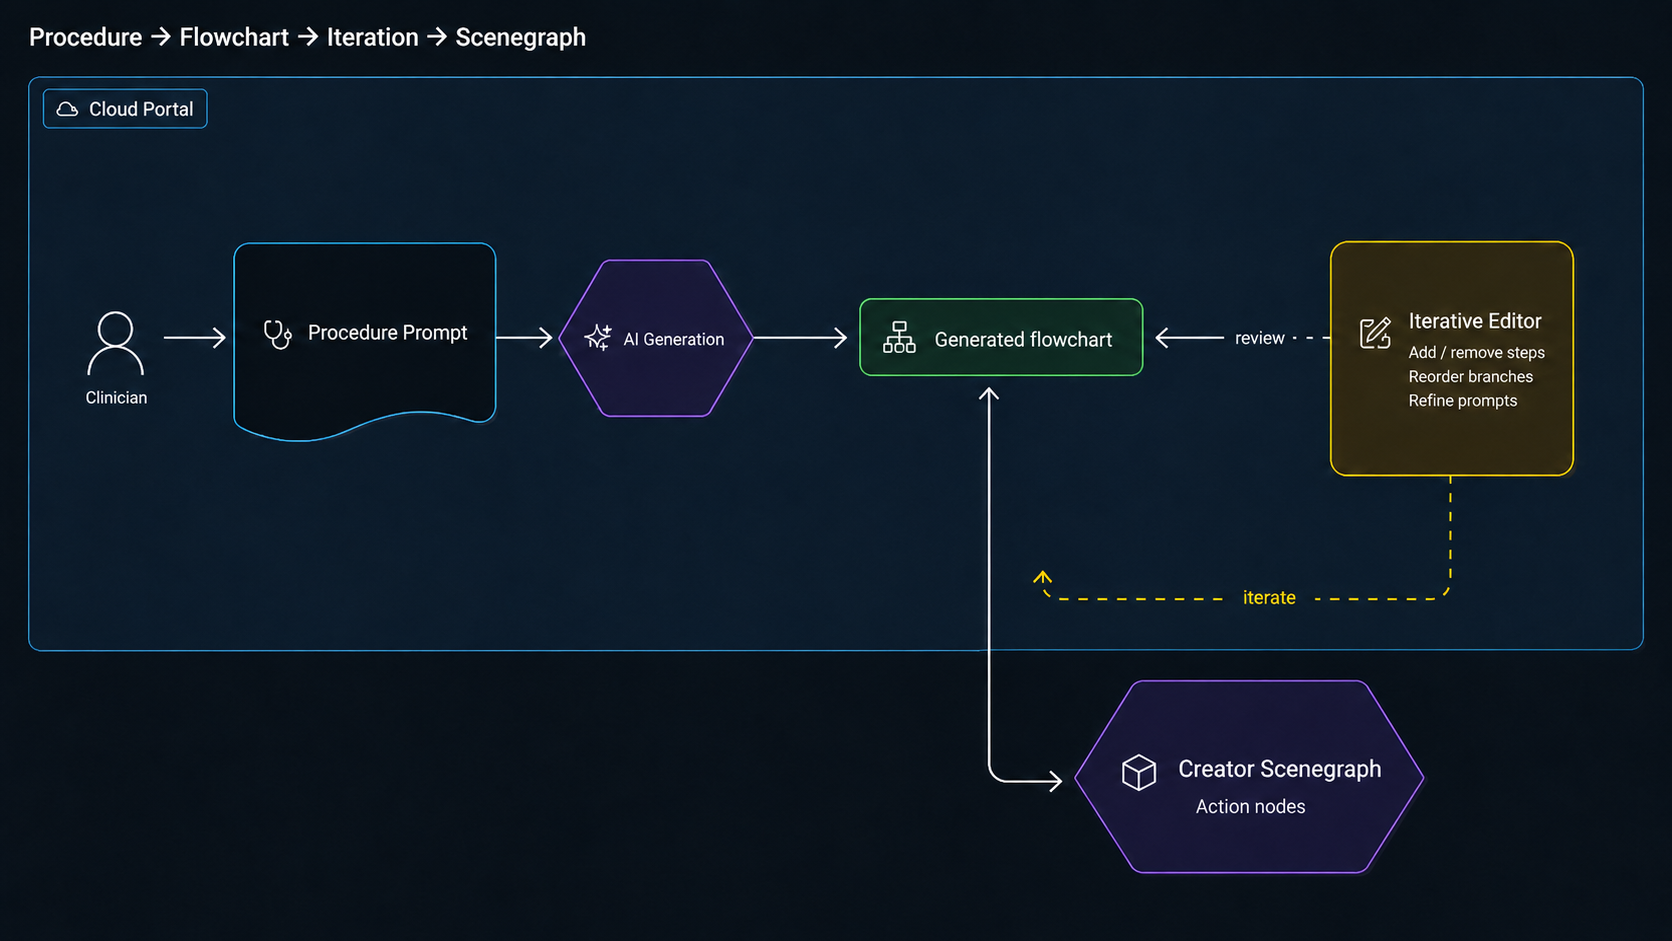
The end-to-end loop: a procedure description becomes a storyboard in the Portal, then imports into the Creator.
What a storyboard contains
A storyboard is a flow graph of a procedure stored in the cloud. Each storyboard carries:
Actions – the individual steps a trainee performs, typed by the kind of interaction they require (Insert, Use, Remove, Trajectory, Question, …).
Edges – flow connections between actions, including parallel branches and conditional decision points.
Groups – stages or chapters that bundle related actions together (e.g. Preparation, Insertion, Closure).
Scenario objects – a flat catalog of the tools, anatomy and instruments referenced anywhere in the actions.
End-to-end flow
The flow below is what most teams follow on a fresh procedure.
Open the Storyboard area in the Portal. Sign in to the ORamaVR Portal, then navigate to
Storyboard > Overview.Create the draft. Click Create Storyboard, enter the Storyboard Name, Project Description, and procedure steps, or drag a procedure PDF onto the page. Click Generate & Open.
Review the generated flow. The Portal opens the generated storyboard in
Storyboard > Storyboard Editor, where you can reorder actions, split or merge groups, and adjust labels.Inspect the actions. Open
Storyboard > Inspect Storyboard, select the storyboard, and review each action’s type, title, tool, summary, payload, error description, and generated image.Check the object catalog. Open
Storyboard > Object Catalogto review the tools, anatomy, instruments, and other scenario objects the storyboard references.Save the storyboard. Save from the Storyboard Editor or the Inspect Storyboard page when the graph and action details are ready.
Import the storyboard from Creator. In Unity, open the Creator SceneGraph, choose the Storyboards tab, select the saved cloud storyboard, and click Download & Import.
The two surfaces
The ORamaVR Portal
The ORamaVR Portal owns the authoring part of the loop. The Storyboard menu covers the full lifecycle:
Overview - create a new storyboard and open saved storyboards.
Storyboard Editor - refine the visual flow and save the graph.
Inspect Storyboard - per-action review with image regeneration and field-level re-planning.
Object Catalog - objects and tools referenced in the storyboard.
Generating, importing from PDF, refining, inspecting and saving all happen here. The Portal is also where the storyboard is stored: the cloud holds the canonical copy, and every other surface reads or writes through it.
Create a storyboard in the Portal
Sign in to the ORamaVR Portal with an account that has access to the Storyboard feature. An account with Creator Pro License.
From the left navigation, open
OMEN > Storyboard > Overview.Click Create Storyboard.
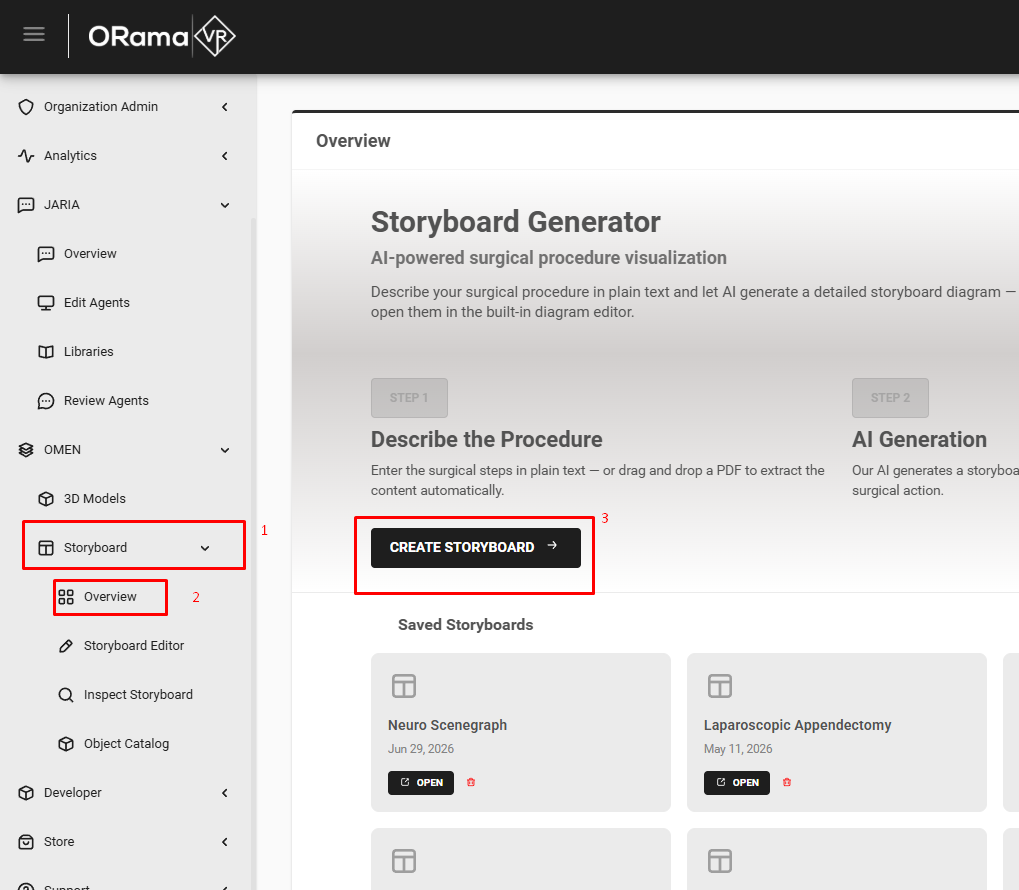
Fill in your Storyboard Name and Project Description.
Add the procedure steps into Describe the surgical procedure steps, or drag a PDF onto the page to extract the procedure text.
Click Generate & Open.
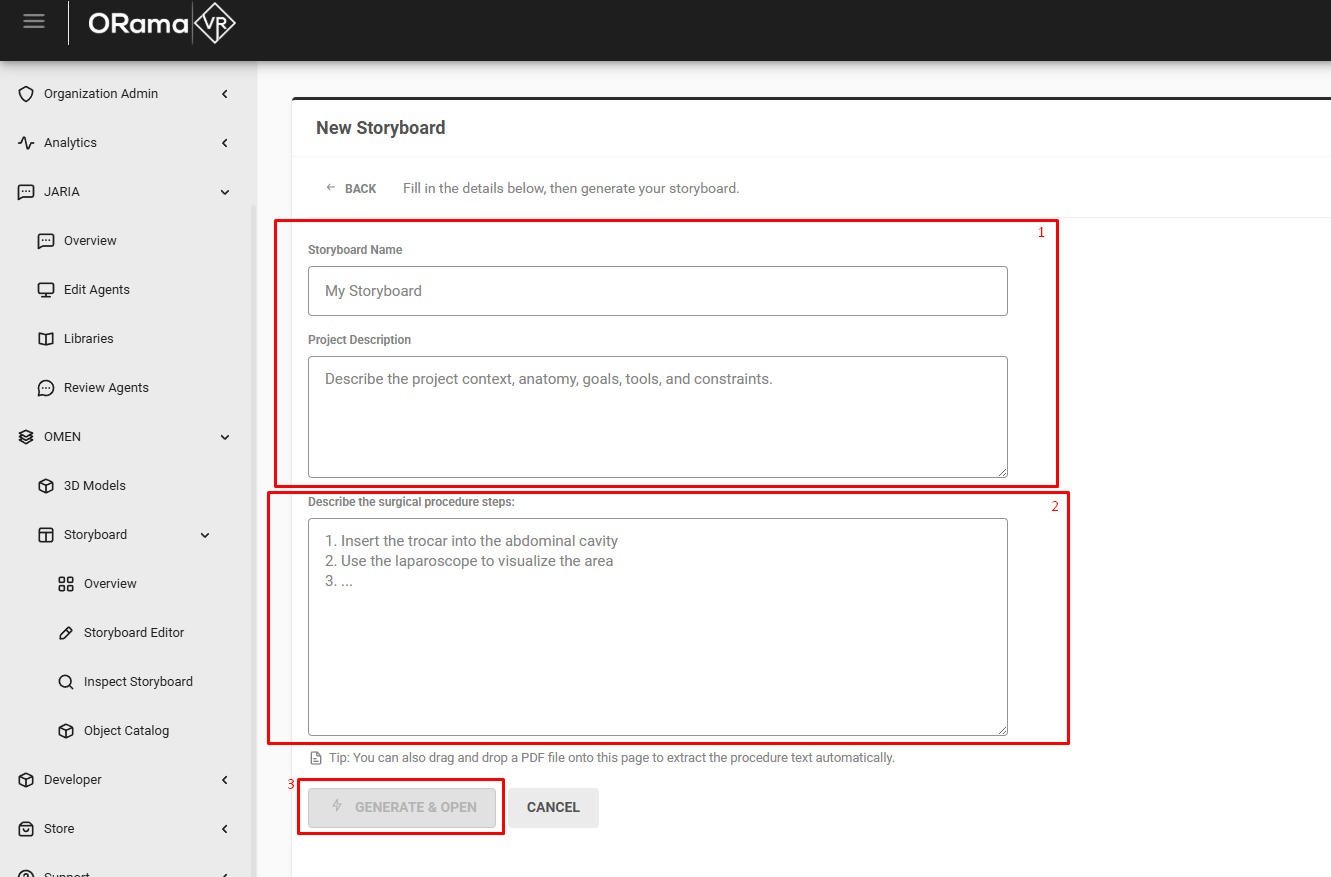
When generation finishes, the new graph will open automatically. After you review it, click Save.
Review a storyboard in the Portal
Open
OMEN > Storyboard > Overview, find the saved storyboard, and click Open to load it in the editor.Open
OMEN > Storyboard > Inspect Storyboard, select the storyboard from the dropdown, and review the generated actions one by one.Edit action fields or regenerate the data for a single action when only that action needs work.
Open
OMEN > Storyboard > Object Catalog, select the same storyboard, and confirm that the referenced objects match the procedure.Save changes before moving to Creator.
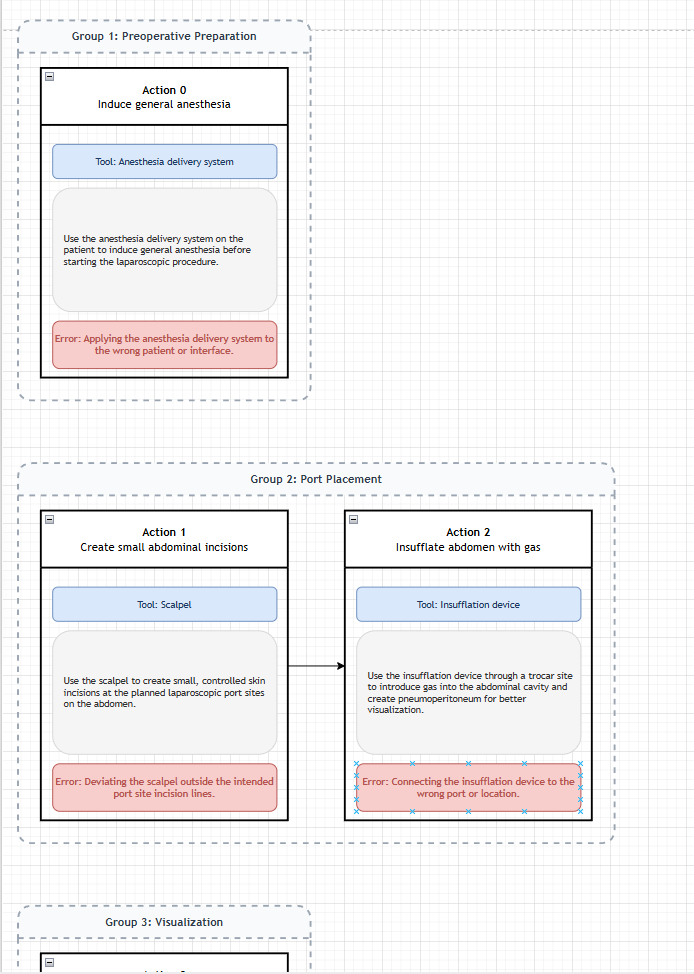
Editor¶ |
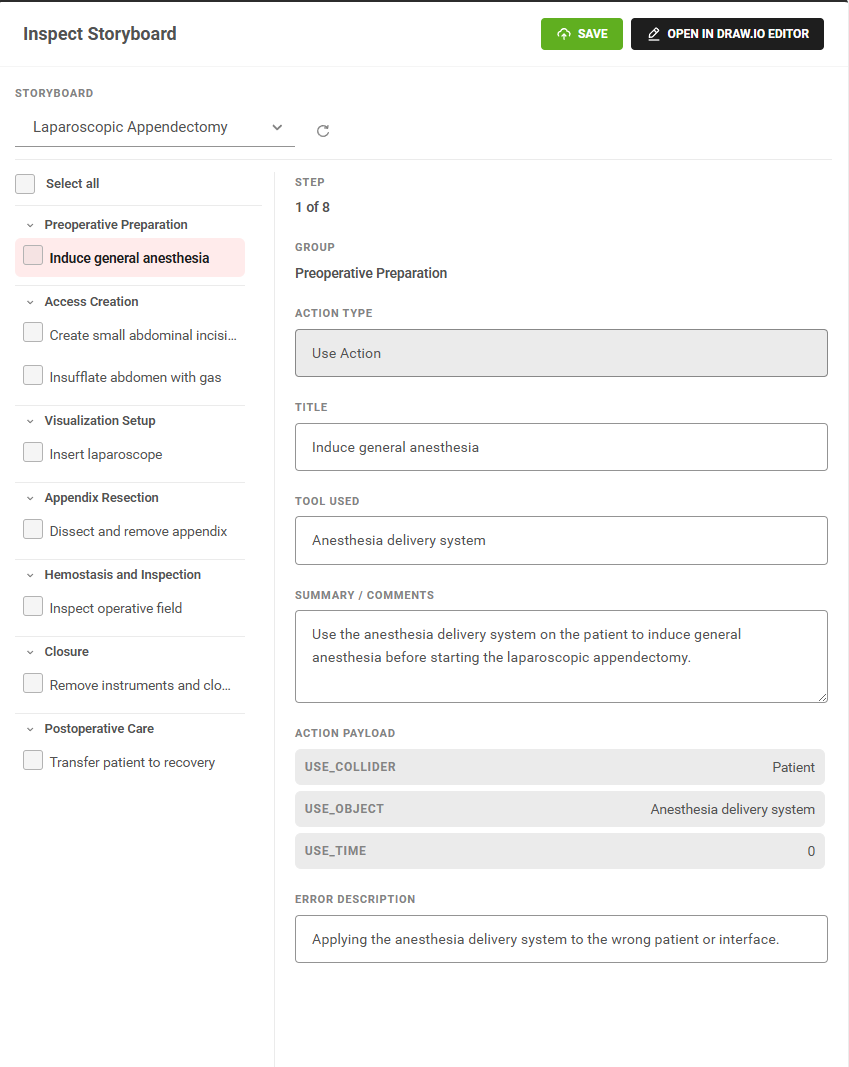
Inspect Storyboard¶ |
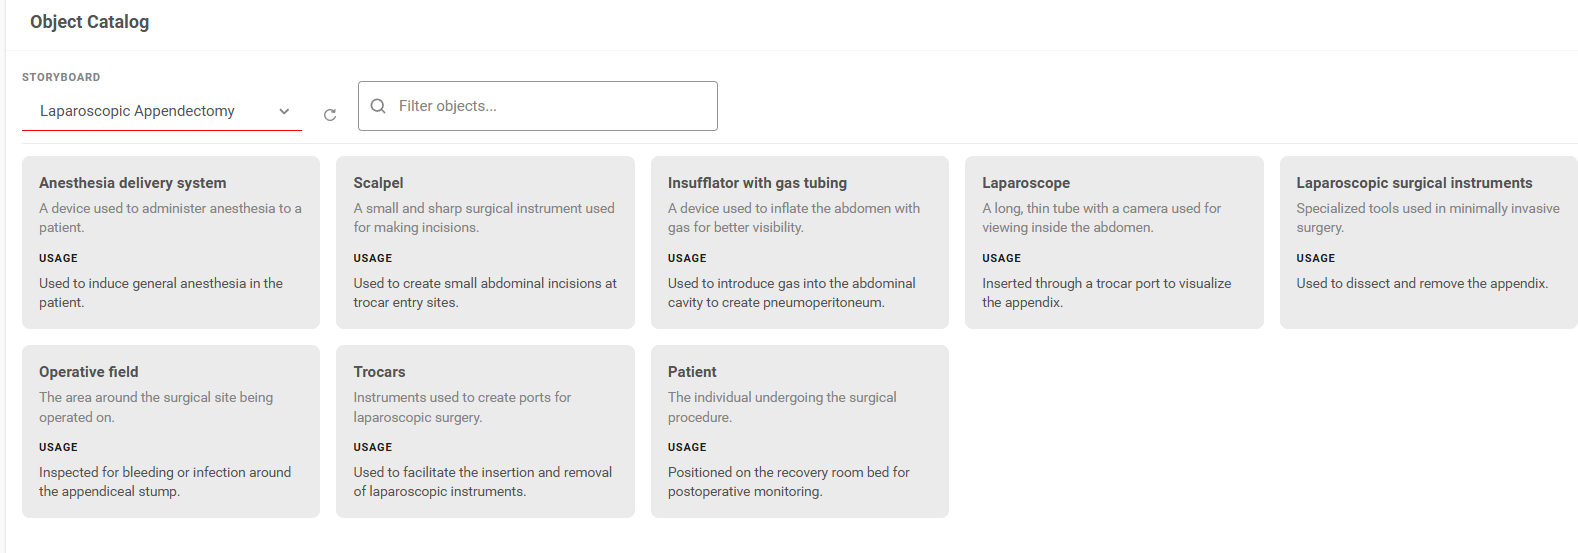
Object Catalog¶ |
Generating images and regenerating action fields
Use the Inspect Storyboard page when the graph structure is correct but one or more actions need better supporting details. Both tools use the selected action’s Summary / Comments field as their main context:
Generate Images creates or replaces the reference image for the selected action.
Regenerate Action Fields refreshes the structured action details, such as the action type, tool, payload, and error description.
If an action’s summary is too generic, update Summary / Comments first. Then select the action from the checkbox list on the left and click Regenerate Action Fields at the bottom of the panel. Once the fields describe the action correctly, keep the action selected and click Generate Images to create the visual reference. The generated images will automatically be appended in the graph. You can select multiple actions to process them together.
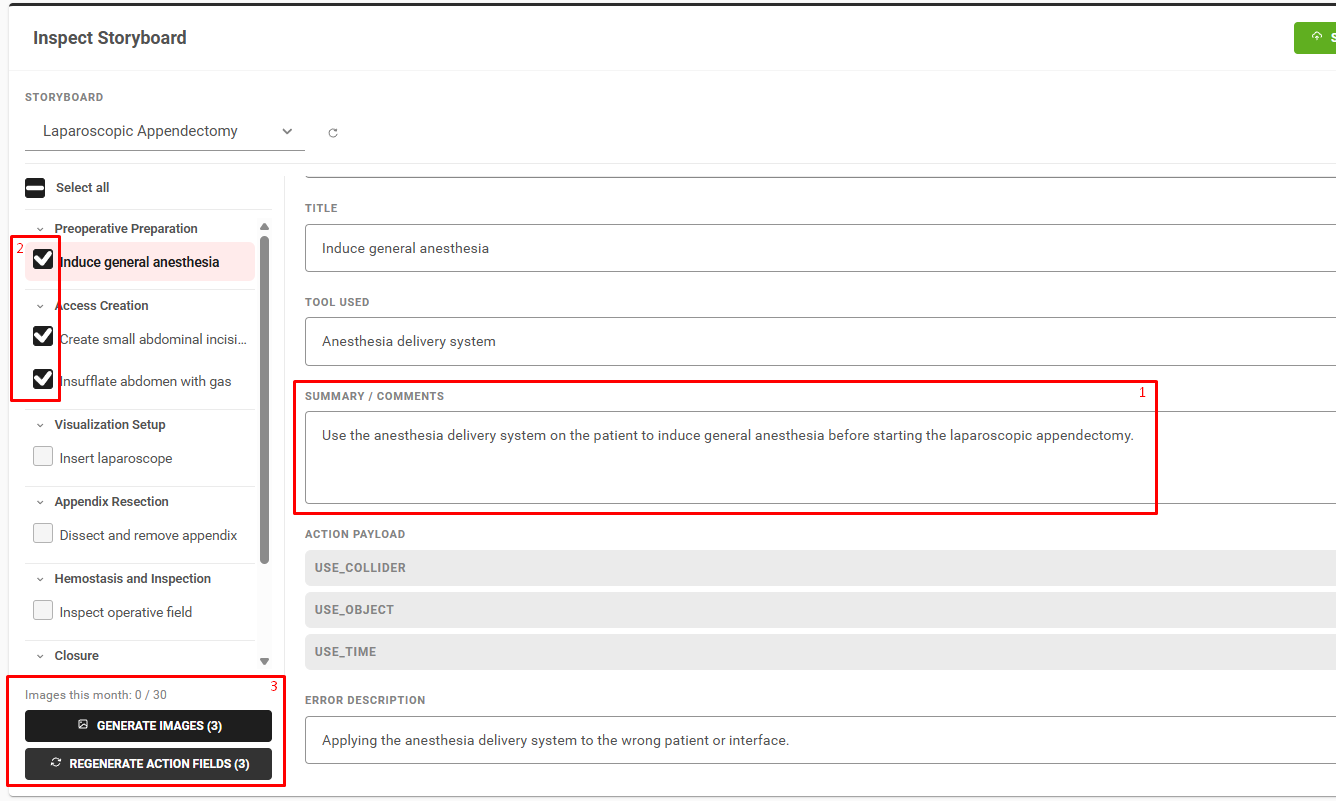
The Creator SDK inside Unity
The Creator owns the import half of the loop. From inside the Creator you can browse the cloud and bring a saved storyboard into your project, where it becomes the input to the rest of the Creator authoring tools. Generation, editing and inspection are not done here — those stay in the Portal.
Import a storyboard in Creator
Open your Unity project and sign in to Creator with the same organization that owns the Portal storyboard.
Open the Creator Panel from
ORamaVR Creator > Panel, then select the Scenegraph Editor tab.Open the SceneGraph you want to populate. You can also use
ORamaVR Creator > Scene Graph Editorfrom Unity’s top menu.In the SceneGraph window, select the Storyboards tab.
In Cloud Storyboards, pick the storyboard you saved in the Portal.
Click Download & Import. Creator downloads the cloud storyboard and converts it into SceneGraph action nodes.
Review the imported actions, then continue Creator authoring by attaching prefabs, configuring action objects, analytics, and any scene-specific behavior.
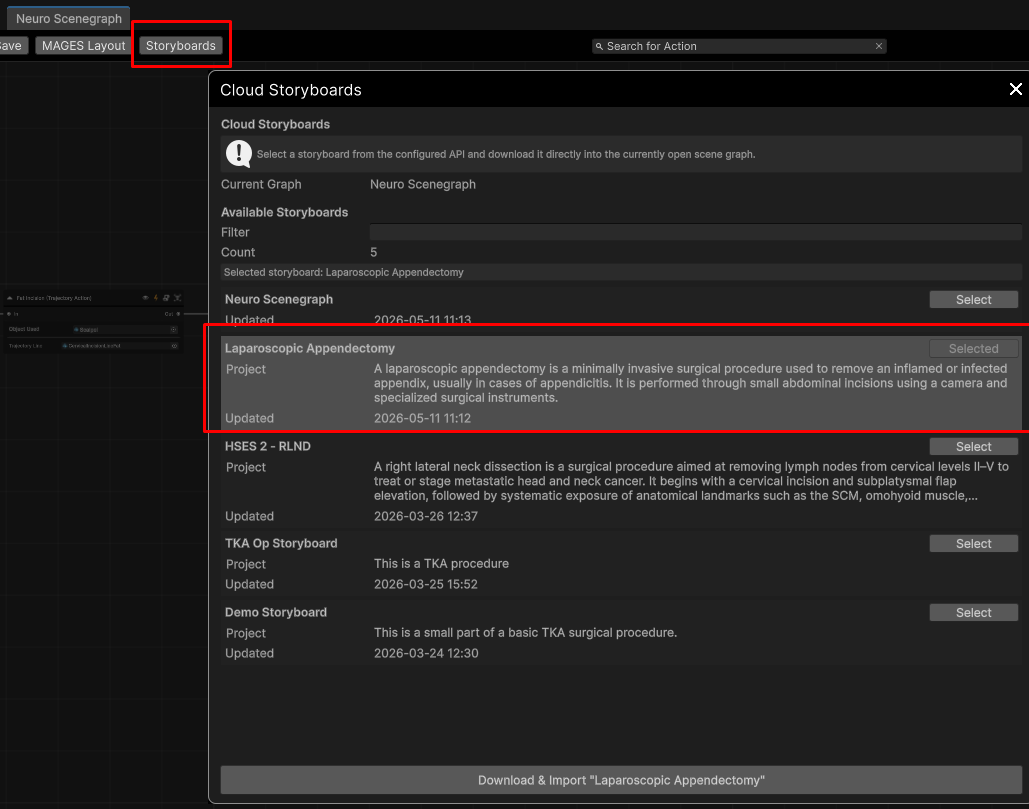
Inside the Creator, browse cloud storyboards and pull one into your project to feed the rest of the authoring pipeline.
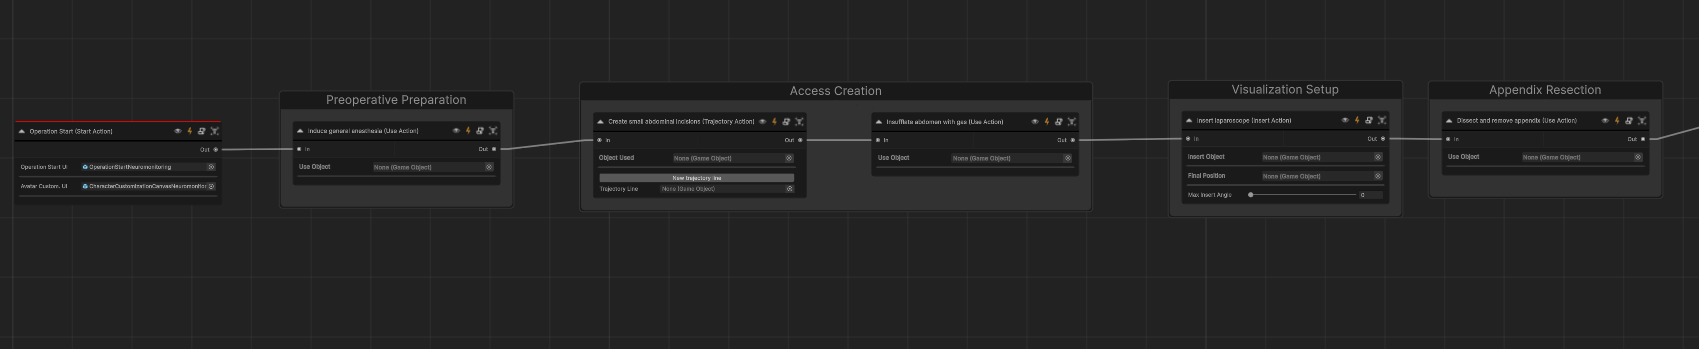
The imported storyboard appears inside the Creator, ready to drive the rest of the authoring pipeline.
Things worth knowing
The Portal is the source of truth. Saved storyboards live in the cloud; the Creator pulls a snapshot when it imports.
Re-prompting re-plans the whole graph. If you regenerate from a description, you start over. Use the Editor for layout changes and the Inspector for per-action edits.
Inspector edits are local to one action. Regenerating an image or re-planning a field on one action keeps the rest of the storyboard stable.