Publish your project
Creator proposes an easy way to publish your simulations.
Scene List
Before you begin building the project, check that the scene you have created is the first scene in the Scene List:
Click on
File > Build Profiles. This will open a new window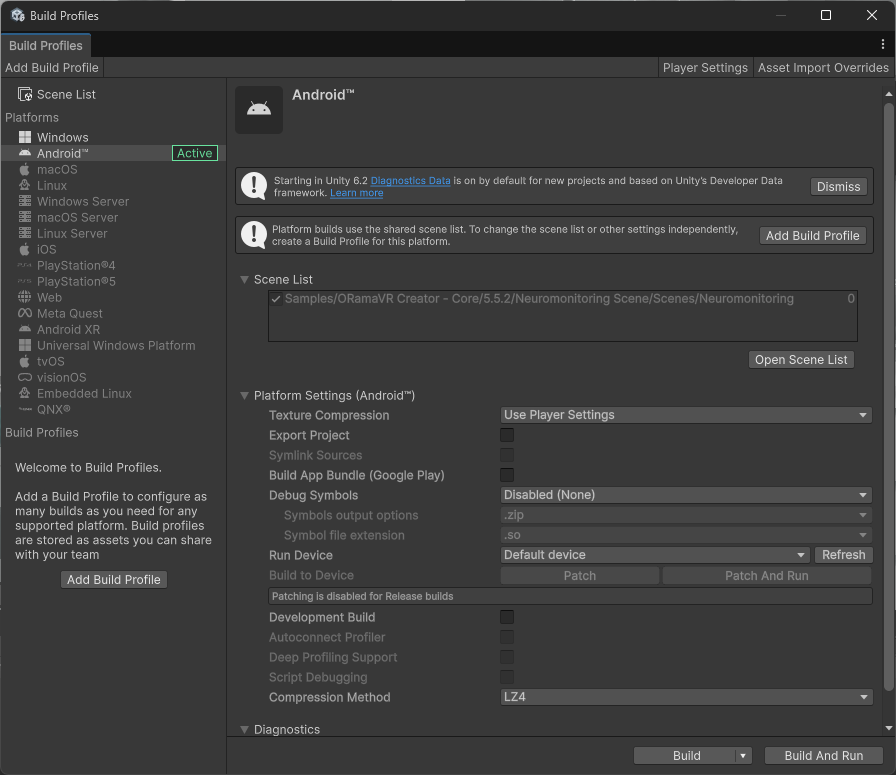
Select
Scene Liston the top left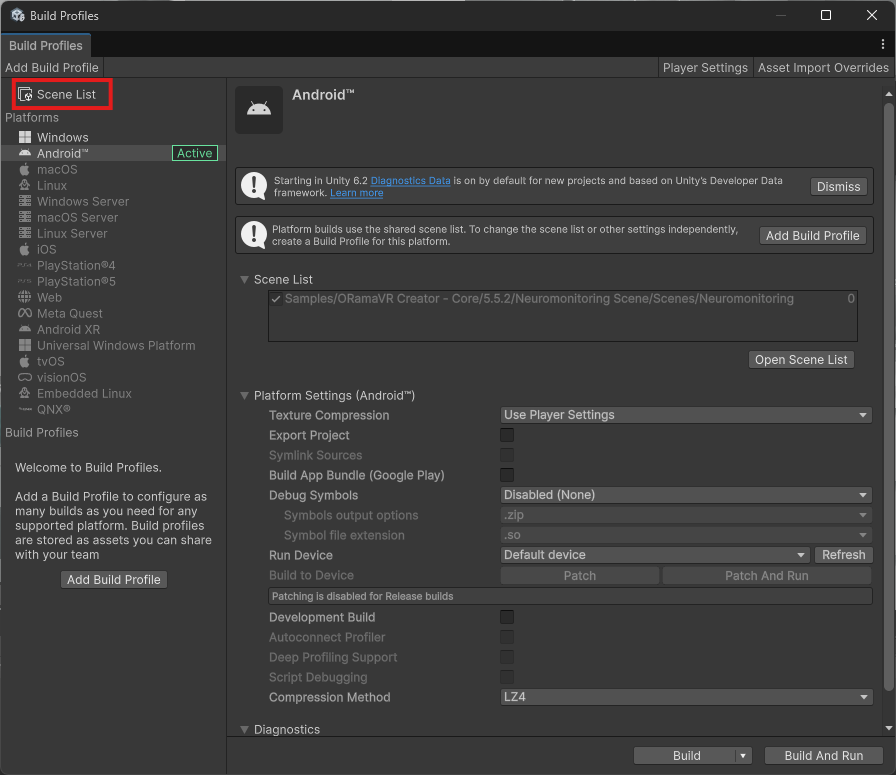
Make sure that your current scene is the first loaded scene
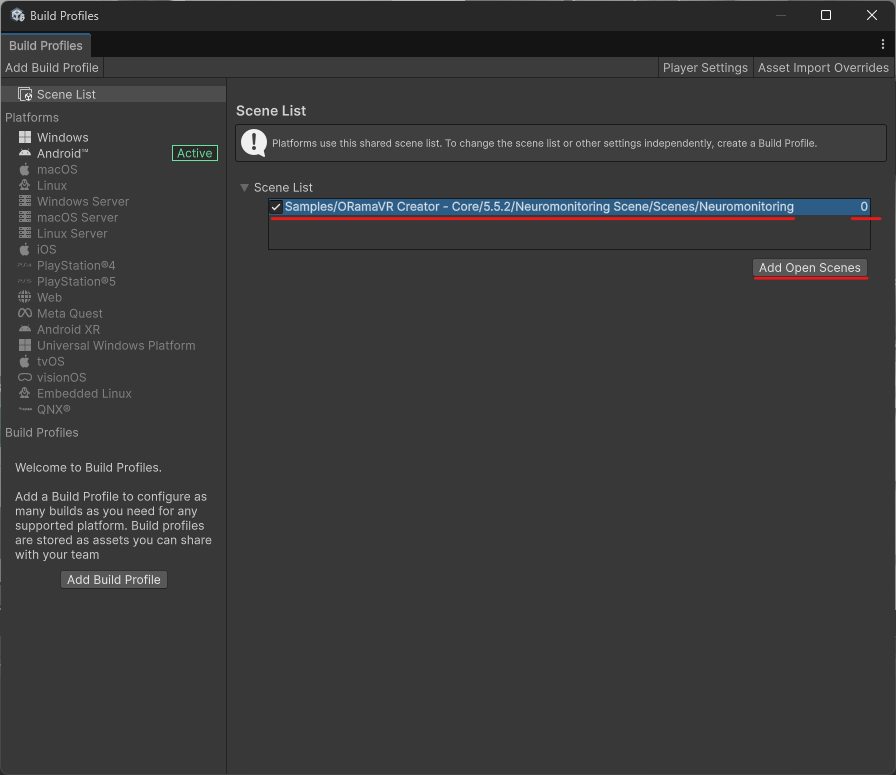
An easy way to do this is to:
Remove every entry (Do this by right-clicking on each row and choosing
Remove Selection)The click on
Add Open Scenes
XR Provider Configuration
The next step is different depending on the target platform. An XR Provider is what enables Unity to communicate with the AR/VR device so that it can receive input from the controllers (or your hands) and display to that device.
Generally speaking, most HMDs can be supported by using the OpenXR Provider. A notable exception is the Apple Vision Pro.
Please choose one of the following providers:
Standalone OpenXR (Meta, Pico, HTC)
This provides support for Standalone Android HMDs like the Meta Quest devices.
Click on
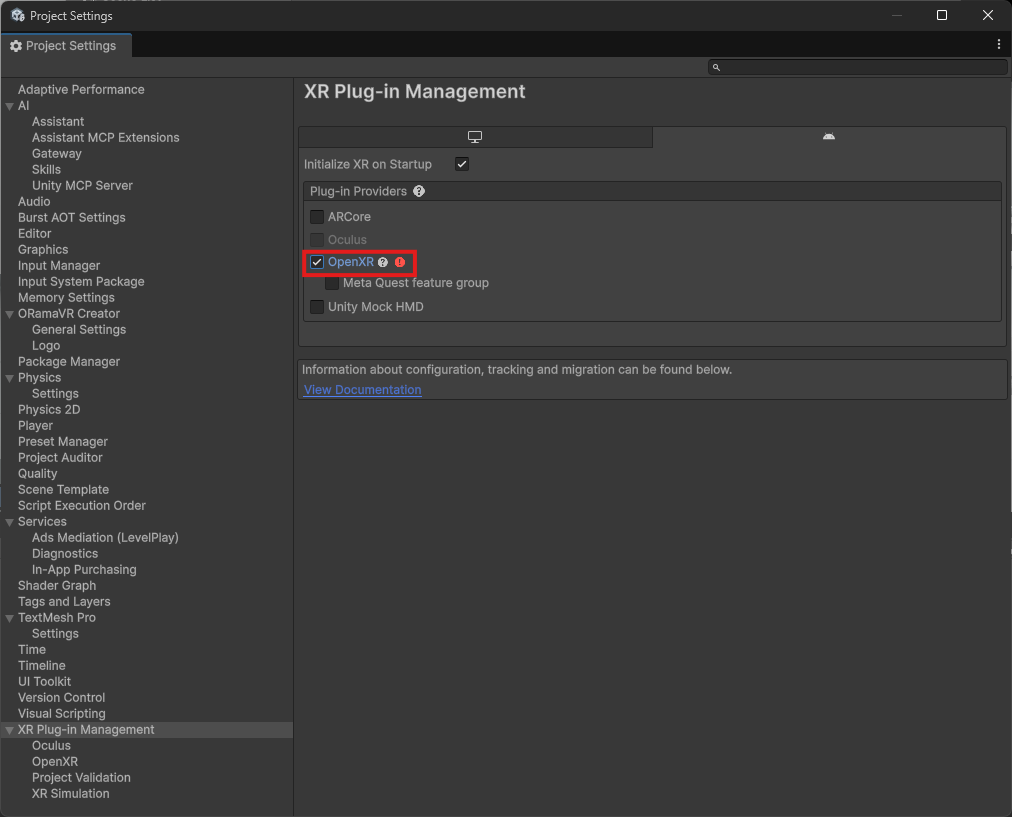
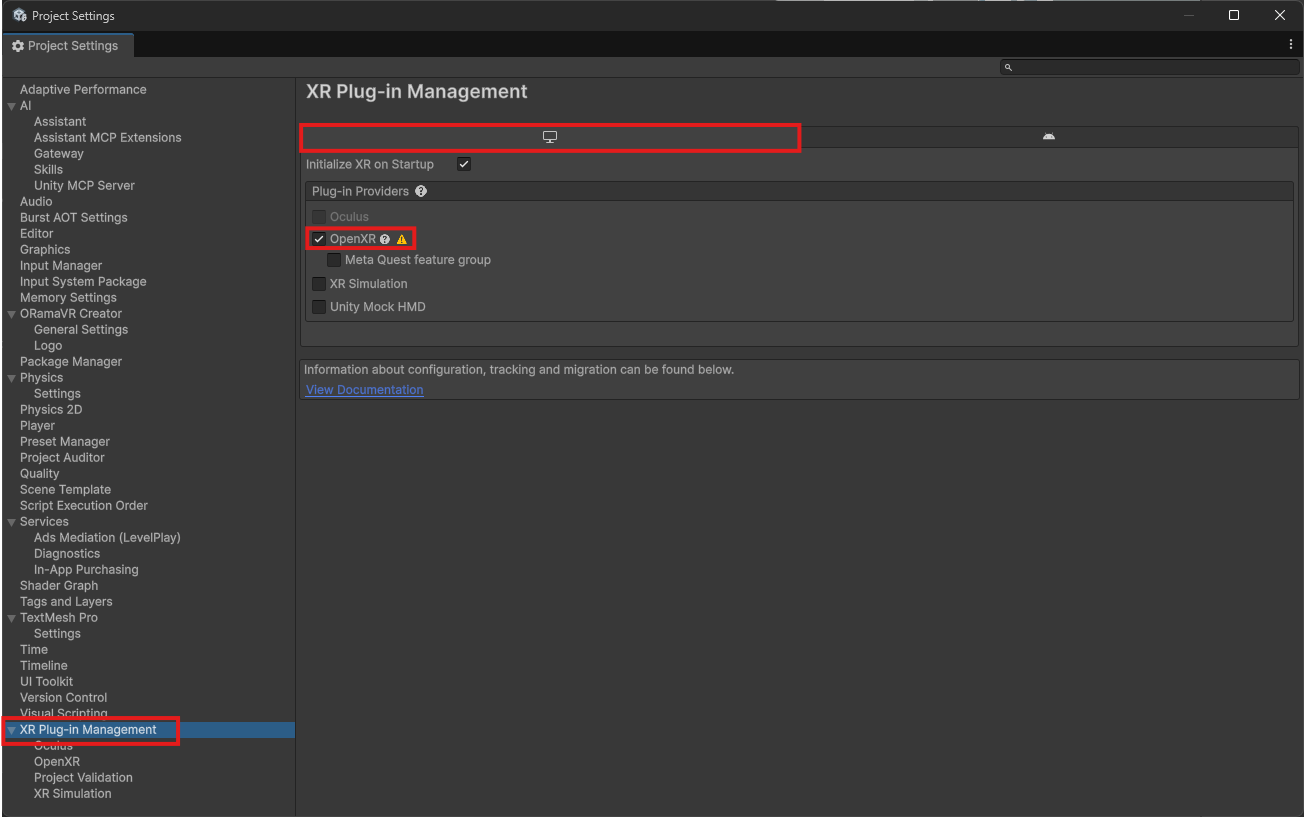
Edit > Project Settings. This will open a new window. On the left hand side, select XR Plug-in Management and choose the Android Platform on the right handside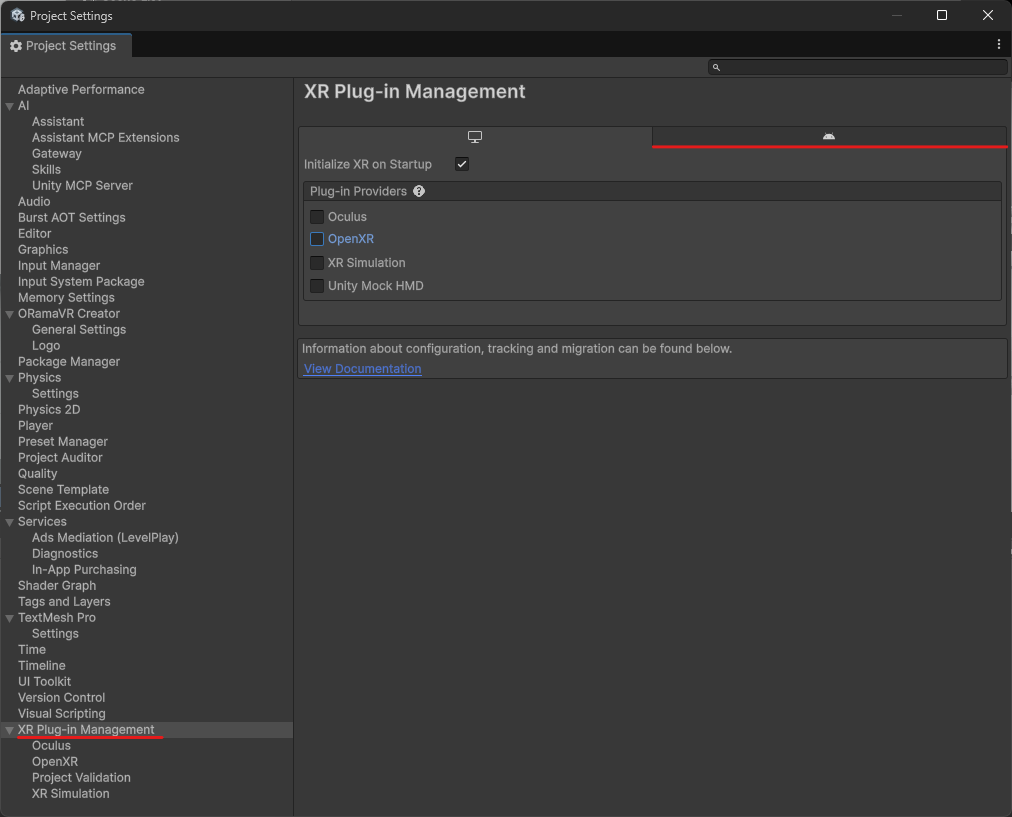
Note
If you cannot see such a tab, then most likely your Unity installation does not include Android Support. Please see the Installation Guide.
Check the OpenXR option to enable this provider
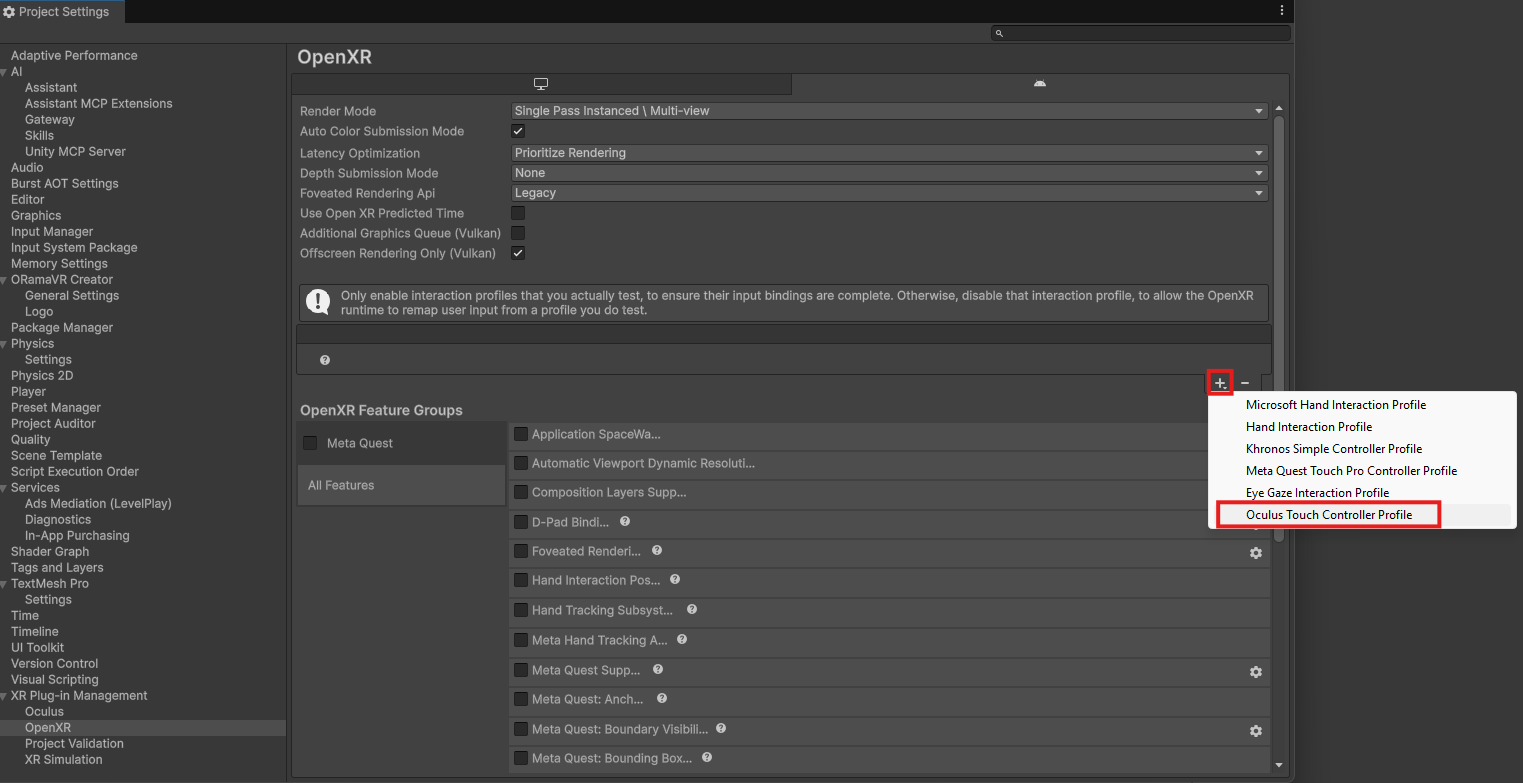
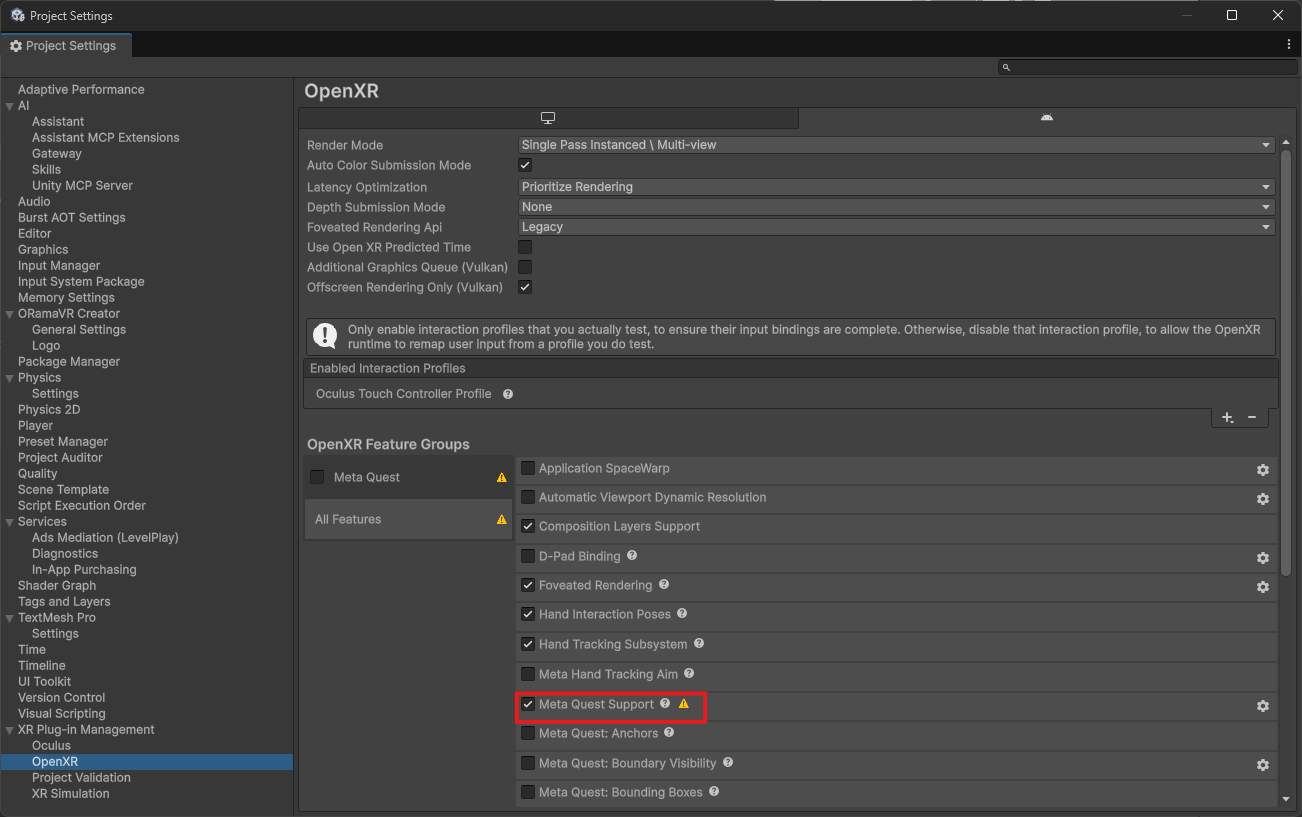
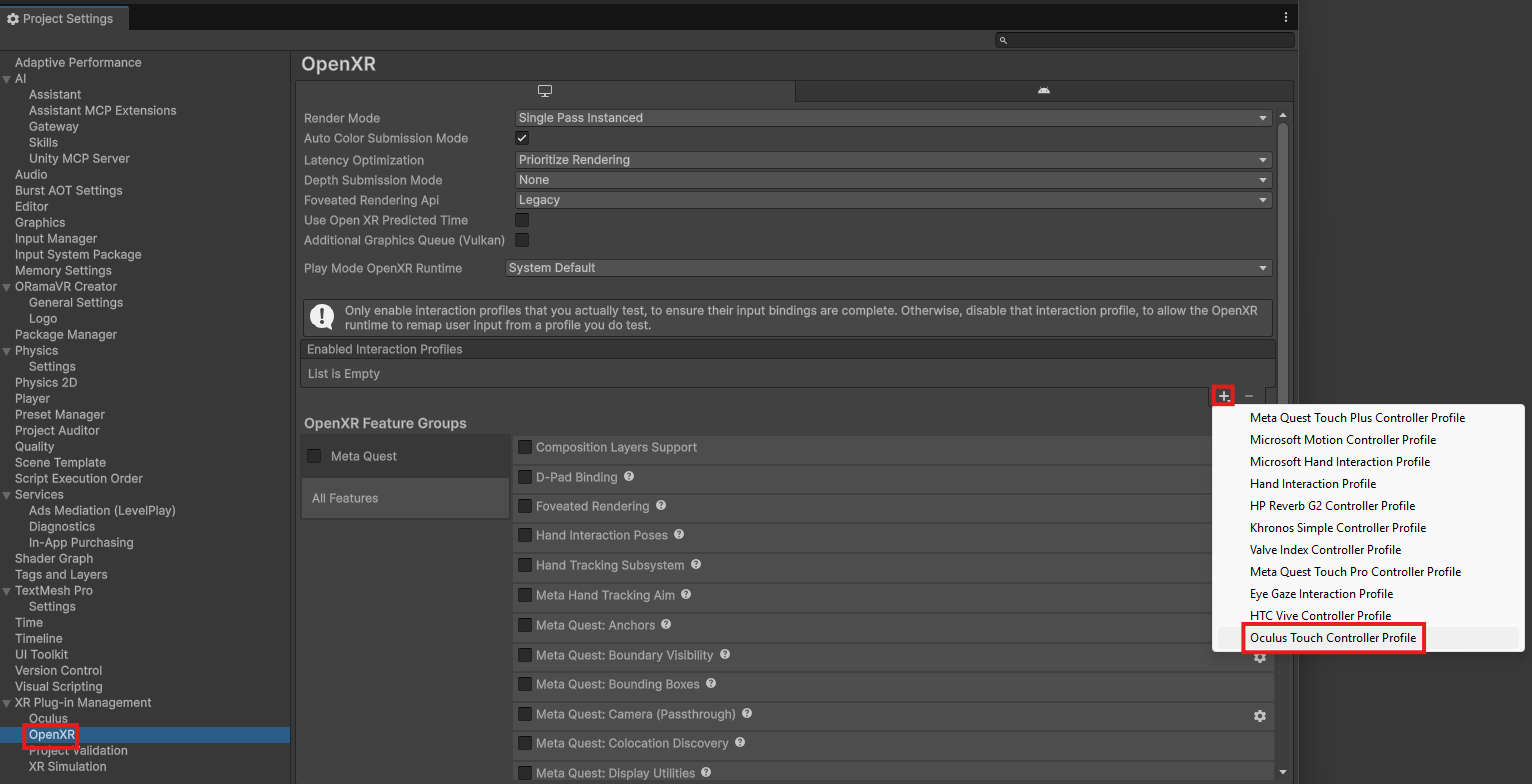
Afterwards, click on OpenXR on the left hand side
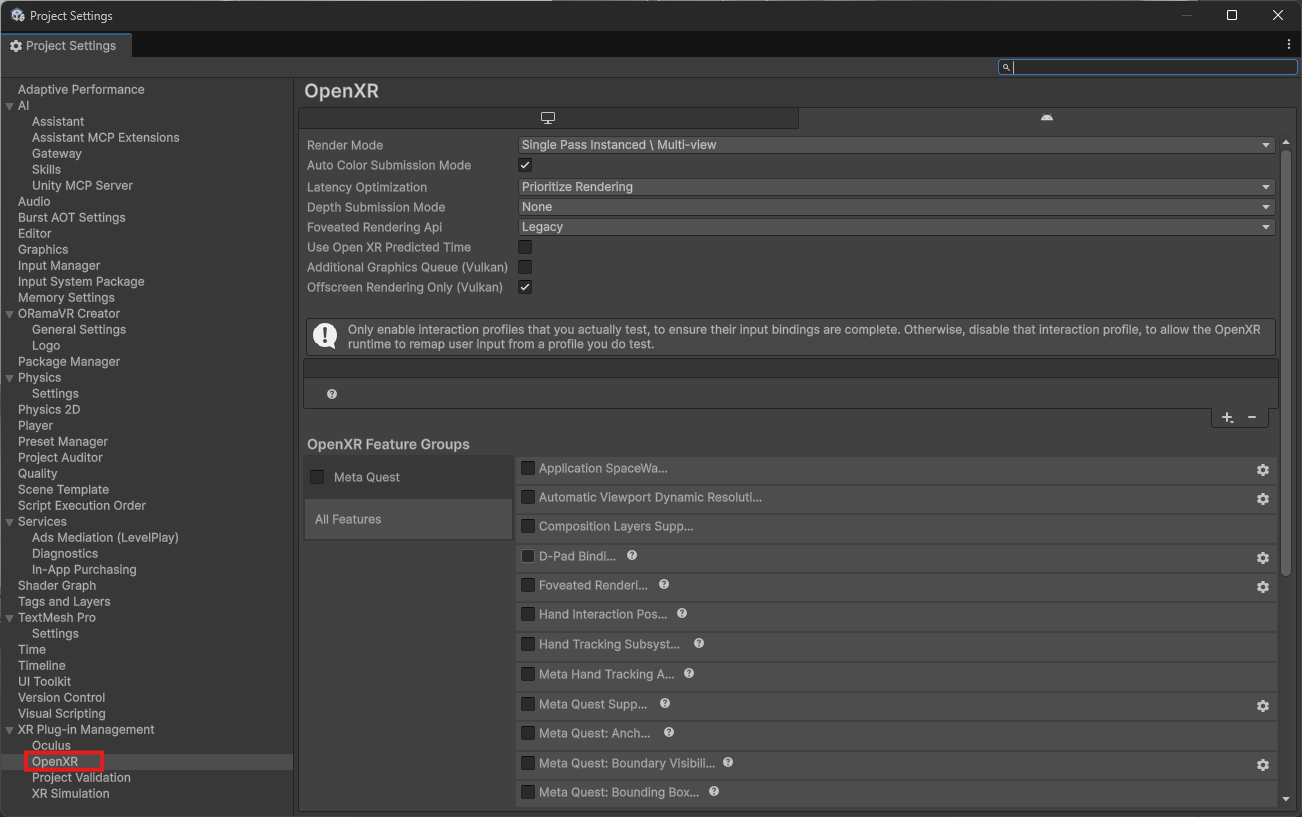
Add the Oculus Touch Controller Profile by clicking on the + button
Check the following Optional features:
Hand Interaction Poses (allows you to use hand tracking poses)
Hand Tracking Subsystem (allows you to use hand tracking instead of controllers)
Foveated Rendering (performance increase)
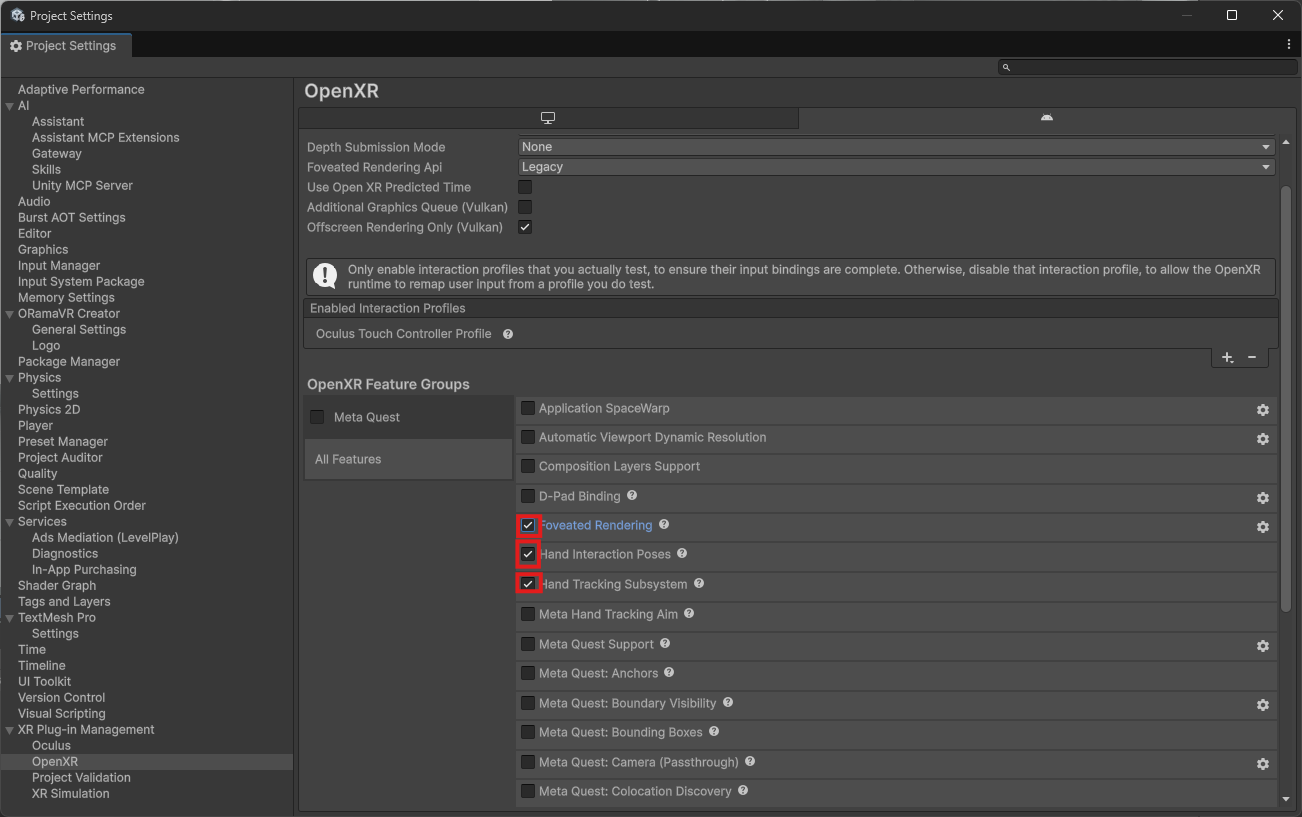
If you are targeting Meta Quest, make sure to also check the Meta Quest Support feature
Desktop OpenXR (Windows, Meta Horizon Link)
This provides support for tethered HMDs to a Desktop device. Currently only Windows is supported by vendors
Click on
Edit > Project Settings. This will open a new window. On the left hand side, select XR Plug-in Management and choose the Windows Desktop Platform on the right handside.Check the OpenXR option to enable this provider
Afterwards, click on OpenXR on the left hand side, and add the Oculus Touch Controller Profile by clicking on the + button
Check the following Optional features:
Hand Interaction Poses (allows you to use hand tracking poses)
Hand Tracking Subsystem (allows you to use hand tracking instead of controllers)
Foveated Rendering (performance increase)
Standalone Mobile (Android, iOS)
This provides support for non-XR devices like phones and tablets. Currently the only supported platforms are Android and iOS
Click on
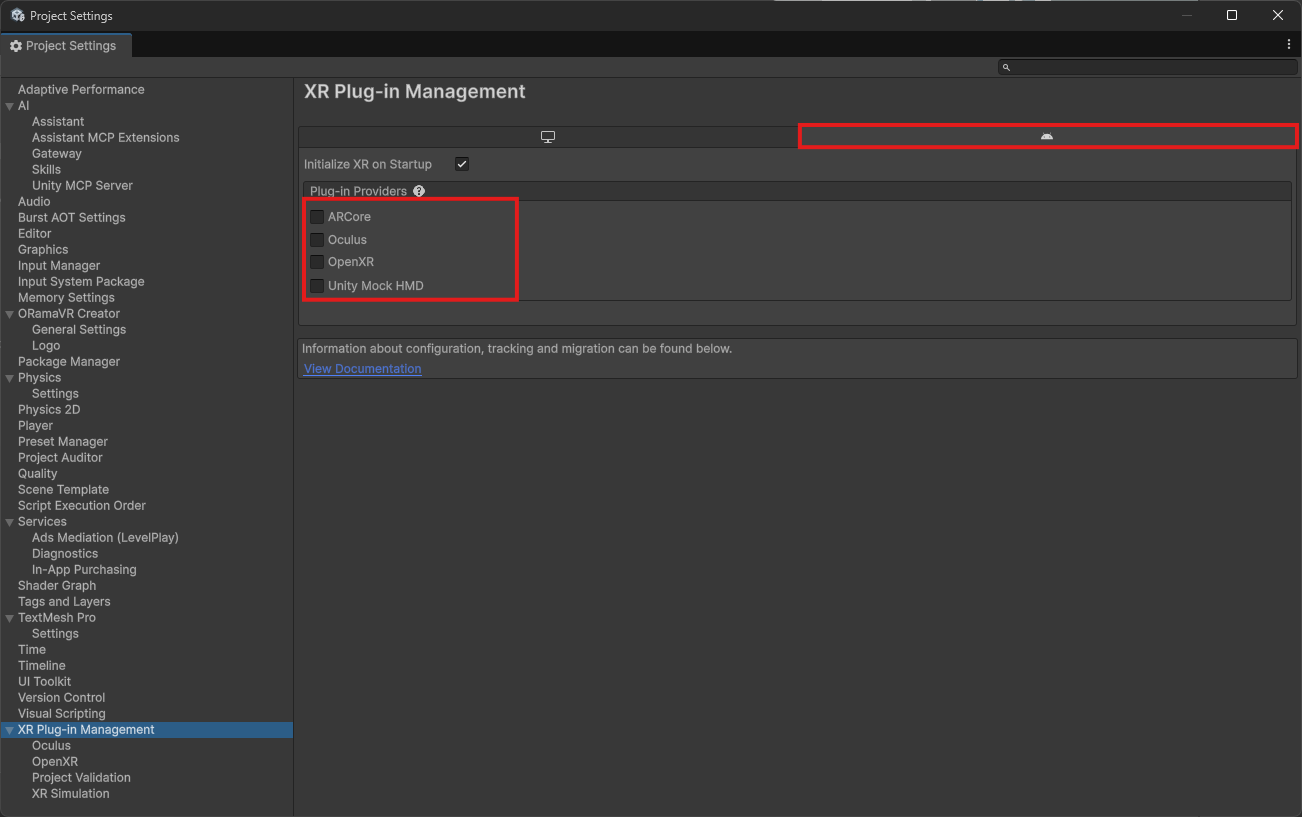
Edit > Project Settings. This will open a new window. On the left hand side, select XR Plug-in Management and choose the Android/iOS Platform on the right handside
Note
If you cannot see such a tab, then most likely your Unity installation does not include Android/iOS Support. Please see the Installation Guide.
Make sure that you have all options turned off.
Build Platform Selection
As the final step to building, you must switch to the target’s build platform. For your convenience, here is a table of several devices and their corresponding build platform:
Device |
Build Platform |
|---|---|
Meta Quest |
Android |
HTC Vive XR Elite |
Android |
PICO 4 |
Android |
Meta Horizon Link |
Windows |
HTC Vive Focus |
Windows |
Valve Index |
Windows |
Apple Vision Pro |
VisionOS |
iPhone/iPad |
iOS |
Android Phone/Tablet |
Android |
Here’s how to switch your platform to Android for example (building for Meta Quest):
Click on
File > Build Profiles. This will open a new windowChoose Android under Platforms on the left hand side:
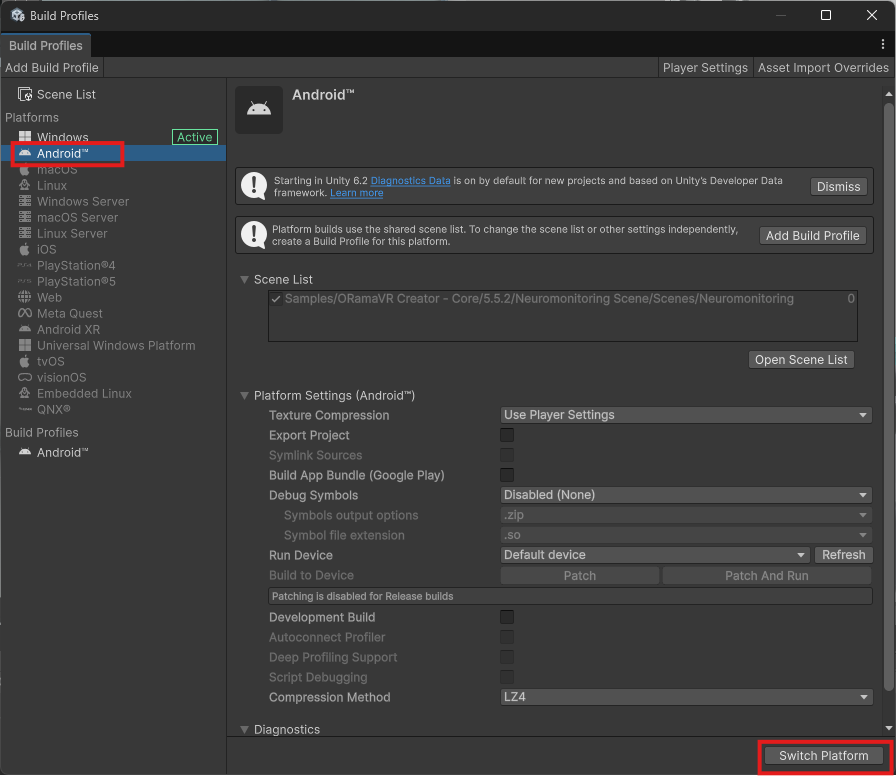
Finally, press Switch Platform. If only see Build then that means you’re currently on that platform and can continue.
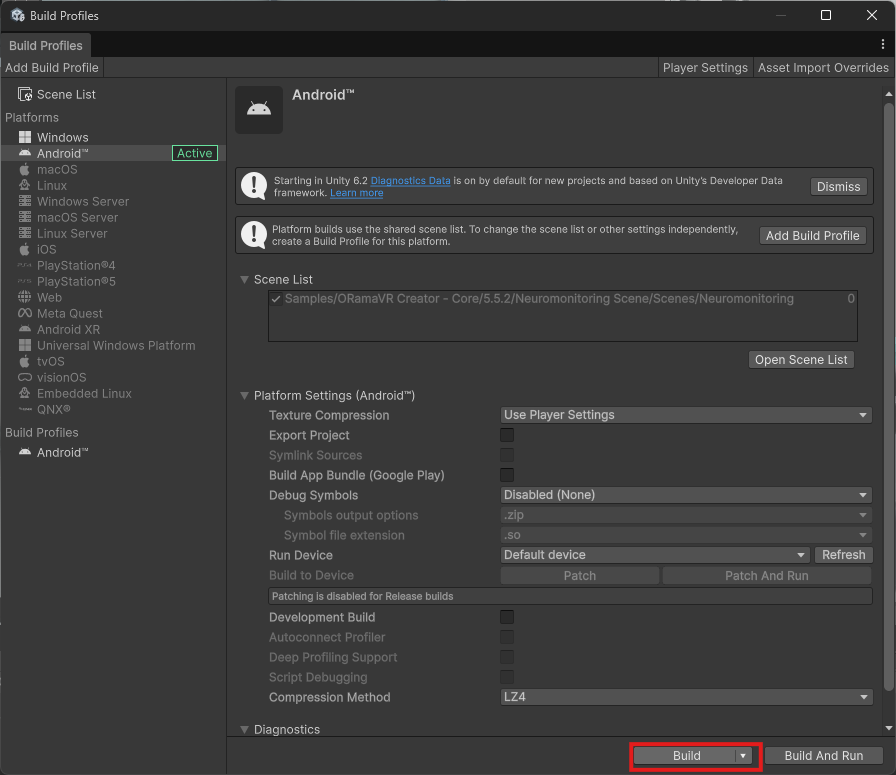
Building
After you have configured your project, you are ready to build!
Click on
File > Build Profiles. This will open a new windowThen on the bottom right, choose Build. This will prompt you for a folder where the build will be saved.
Running
Based on the target device, there are different ways to run and test what you have made:
For Standalone Android HMDs, see Android HMD.
For Windows, you can run the executable file in the build directory you selected.
For iOS Devices (iPhone/iPad), see iOS.
For macOS Devices (Mac Mini/Macbook/Mac Desktop), see macOS.