Tetrahedral Mesh
The tetrahedral mesh is the basis for most simulated object types in Mesh Deformations.
MAGES uses tetrahedral meshes stored in .msh files. If you already have an .msh file,
drag and drop it into the project’s Assets folder. The mesh will be imported automatically
and will be ready to use in the next steps of the workflow.
Warning
At the moment, only Version 2 ASCII .msh files are supported.
If your starting point is a surface mesh (an .stl file, or any mesh already imported into Unity), you
must first convert it into a tetrahedral volumetric mesh. You can do this inside the Unity editor with the
Tetrahedralize window, or externally with third-party tools such as
Salome-Meca and Gmsh.
Tetrahedralizing in the Unity Editor
The Tetrahedralize window converts a Unity Mesh directly into a .msh asset, without leaving the
editor. Open it from ORamaVR Creator > Mesh Deformations > Tetrahedralize…, or right-click a mesh asset
and choose ORamaVR Creator > Tetrahedralize… to pre-fill the mesh field.
Assign the Mesh to tetrahedralize.
Pick a Tetrahedralizer:
NetGen — a full NetGen-based mesher with detailed controls (mesh size, fineness, grading, optimization steps, and so on). Best quality and control.
Simple — a lightweight built-in tetrahedralizer with a couple of parameters (interior spacing, weld distance). Handy for quick tests.
Adjust the tetrahedralizer’s parameters as needed.
(Optional) Enable Also bake wedge UVs (.tetuv). When the input mesh is UV-mapped and the selected tetrahedralizer supports it, this also writes a per-wedge UV (
.tetuv) sidecar beside the.msh, sourced from the input mesh’s UV seams. That sidecar can be assigned straight to a dynamic softbody — see Texturing.Click Run and choose a save location inside the project’s
Assetsfolder. The resulting.mshis imported automatically.
Tetrahedralizing with External Tools
Use this route when you need a mesher outside of Unity. It converts an .stl into a .msh using
Salome-Meca and Gmsh. The steps below cover preparing the input, tetrahedralizing single or multiple
regions, and exporting the result for Unity.
Note
The tetrahedralization examples below are based on the Salome-Meca workflow. Gmsh is used
afterwards to convert the exported mesh into a Unity-compatible .msh file.
Before You Start
For tetrahedralization, the input .stl should be:
enclosed (watertight)
triangulated
free of self-intersections
The result of this process is a tetrahedral volumetric mesh that can be exported as an
.msh file and imported into Unity.
Tetrahedralizing a Single Region
Use this workflow when the model should become one tetrahedral volume.
Open Salome-Meca.
Switch to the Geometry module.
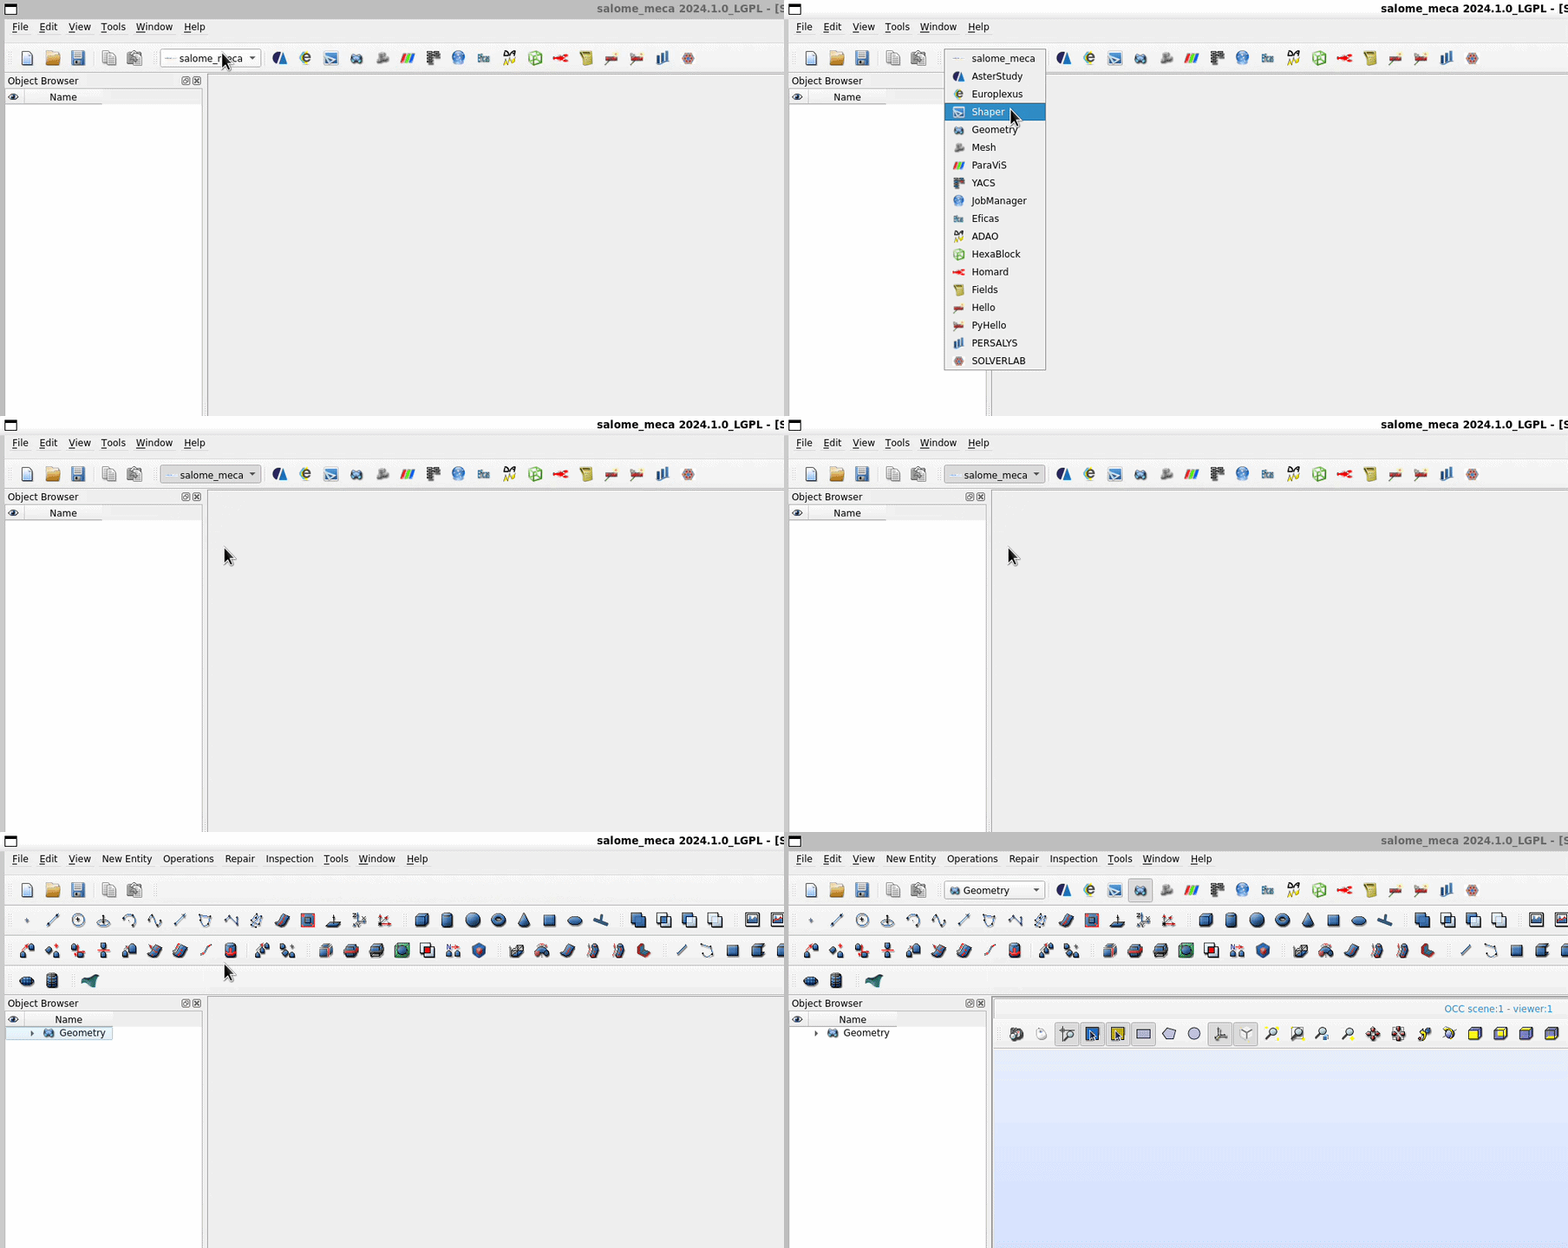
Import the
.stlfile.
Click New Entity > Build > Solid and create a solid from the imported STL geometry.
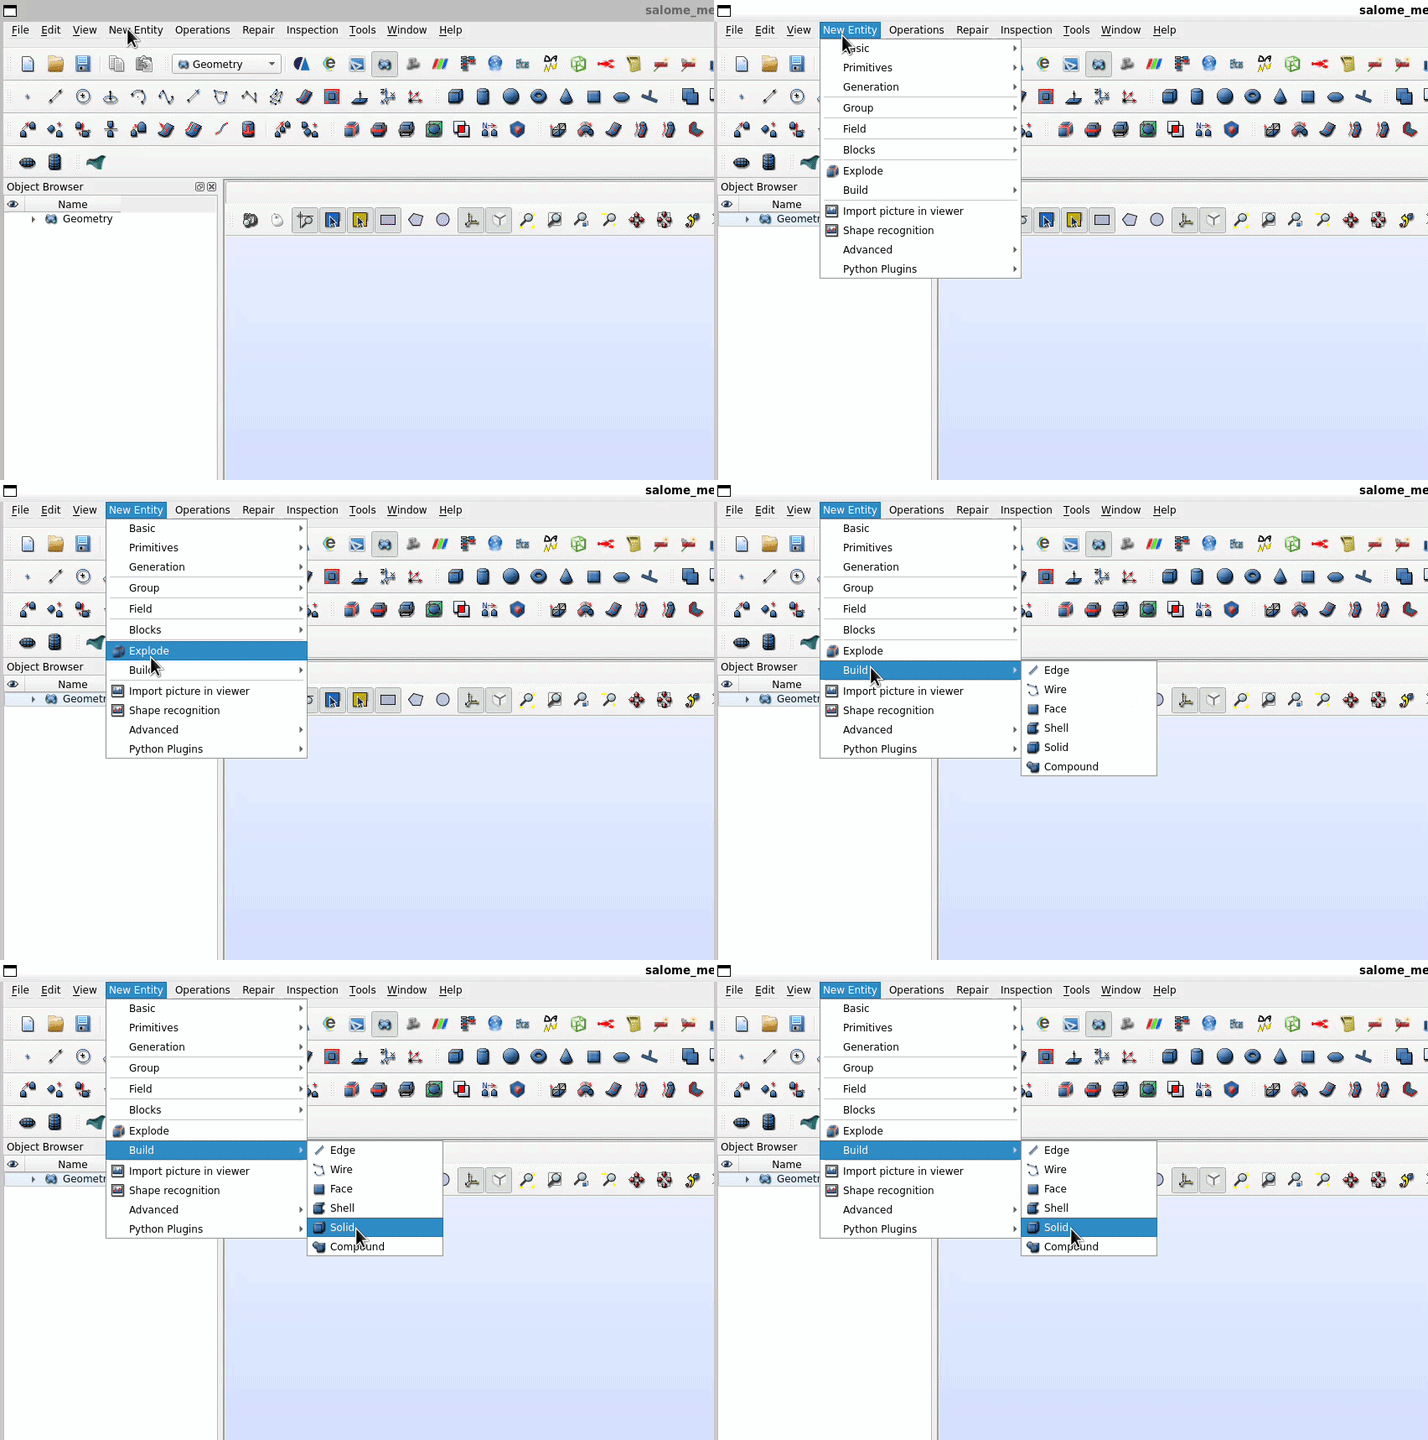
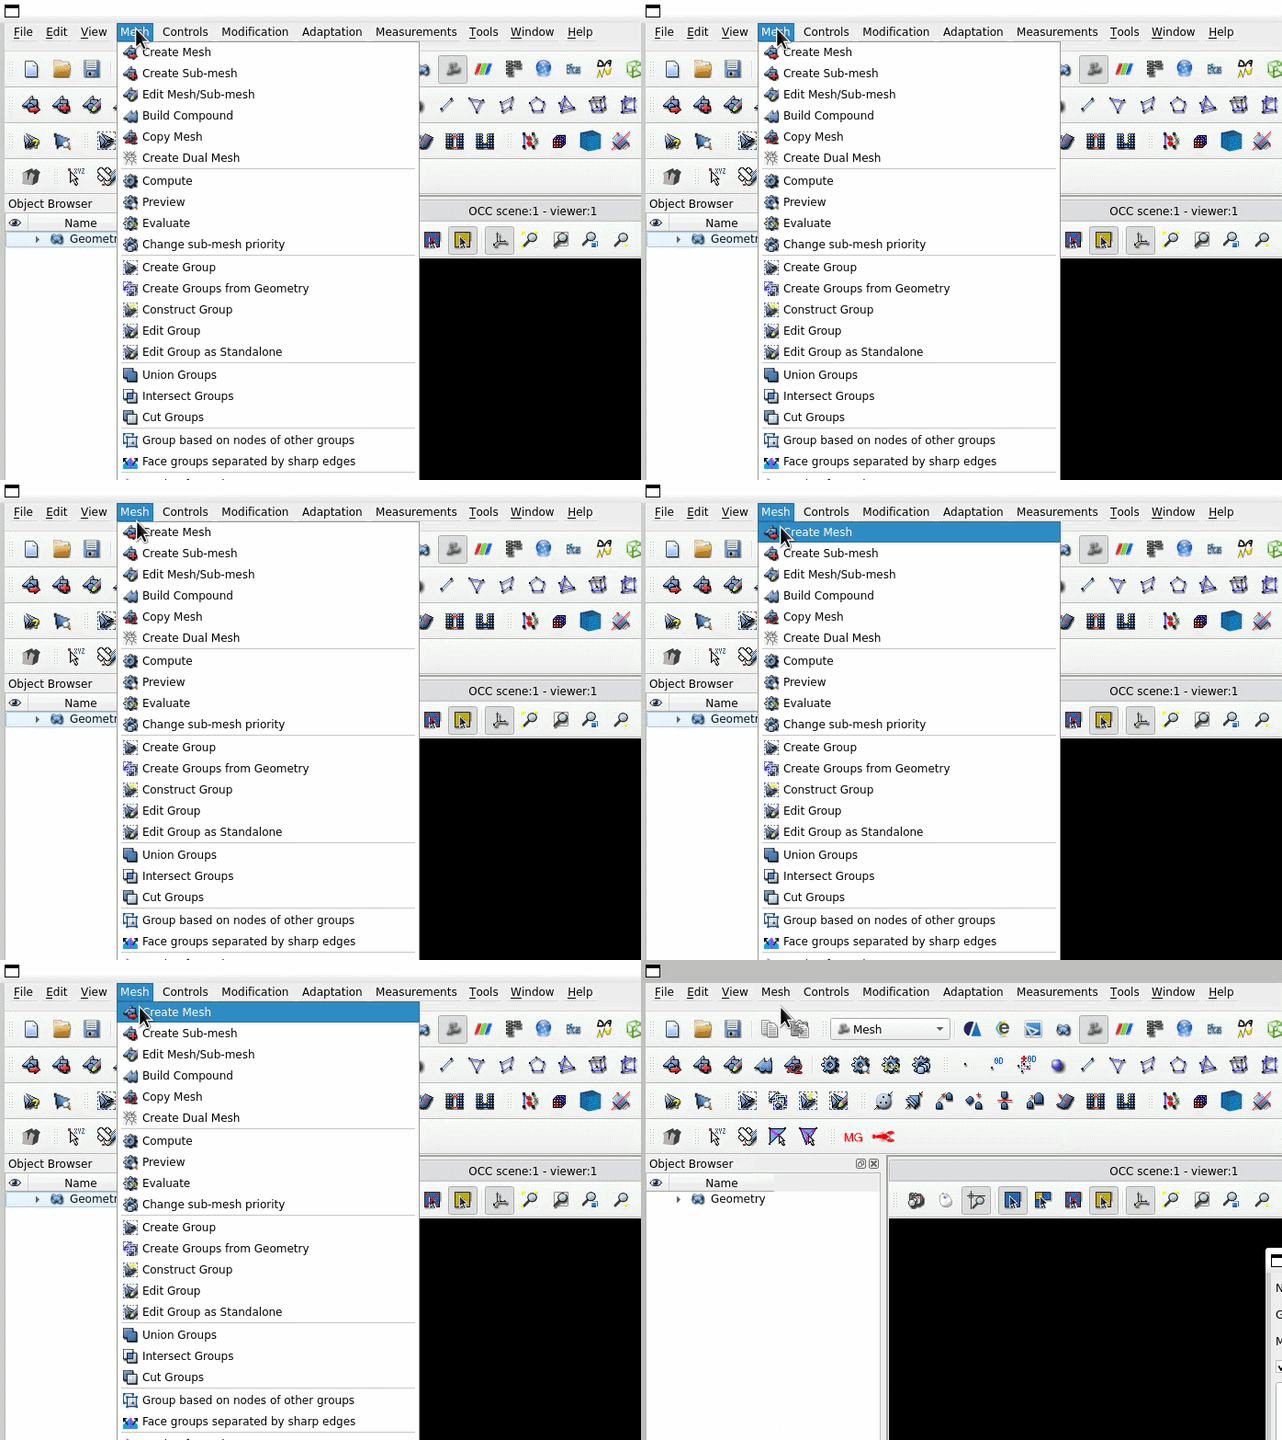
Switch to the Mesh module.

Click Mesh > Create Mesh.
For Geometry, select the solid you created.
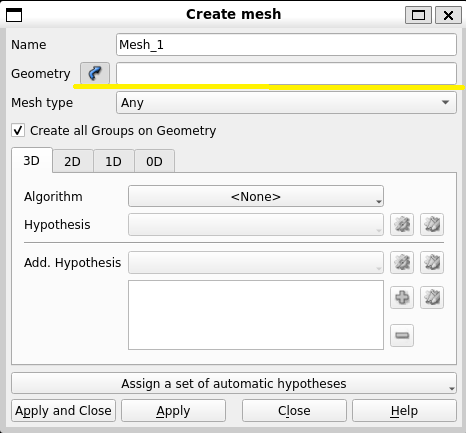
Set the algorithm to NetGen 1D-2D-3D and create a hypothesis with the default values and click Apply and Close.
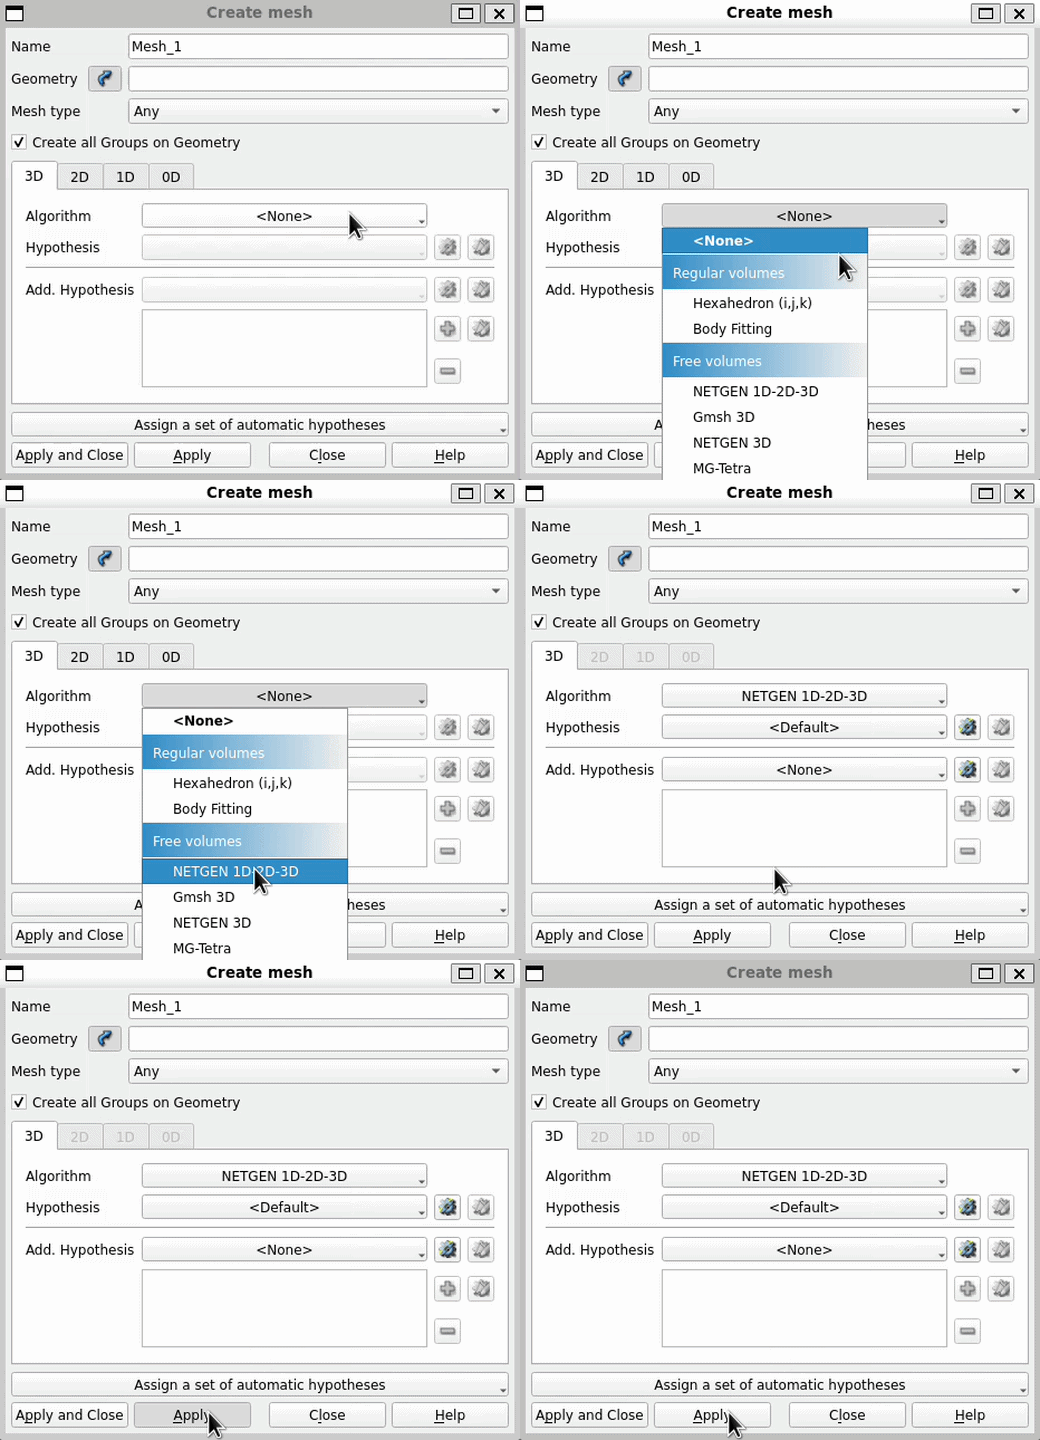
In the Object Browser, right-click the created mesh and select Compute Mesh.
The tetrahedral mesh may appear with a warning icon before computation. This is expected.
If you need a finer or coarser result:
Right-click the hypothesis and select Edit Hypothesis.
Adjust the values and click OK.
Right-click the mesh and select Clear Mesh Data.
Right-click the mesh again and select Compute Mesh.
Tetrahedralizing Multiple Regions
Use this workflow when the model contains multiple regions that you want to preserve in the tetrahedral mesh.
Open Salome-Meca.
Switch to the Geometry module.
Import the
.stlfile.
Click New Entity > Build > Solid and create solids from the imported geometry.
Select the objects that should be combined and click Operations > Partition.
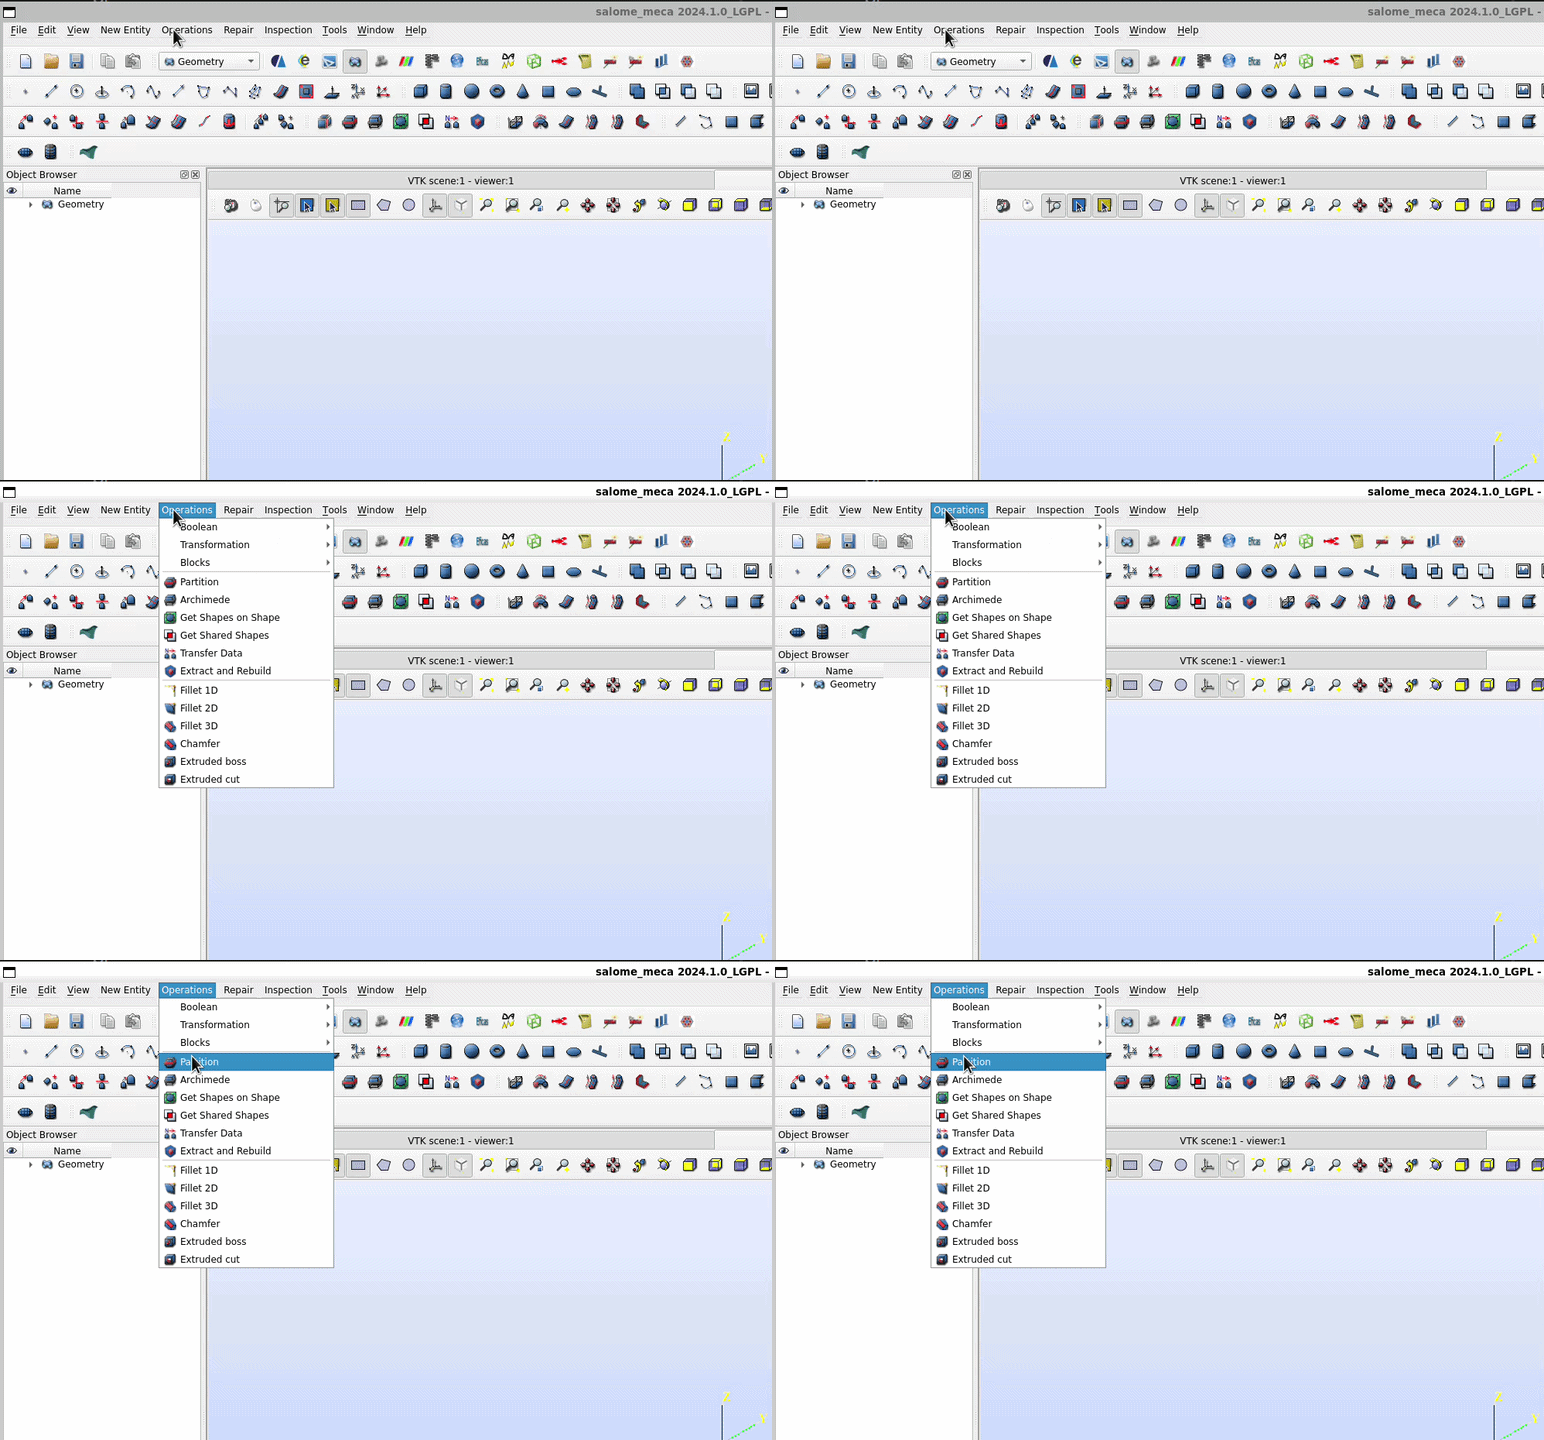
Use Explode with Solid as the type so the partitioned result is split into separate solid regions.
Switch to the Mesh module.
Click Mesh > Create Mesh.
For Geometry, select the solid or partitioned result you want to tetrahedralize.
Set the algorithm to NetGen 1D-2D-3D and create a hypothesis with the default values and click Apply and Close.
In the Object Browser, right-click the created mesh and select Compute Mesh.
You can refine the result in the same way as in the single-region workflow by editing the hypothesis, clearing the mesh data, and computing the mesh again.
Exporting for Unity
After tetrahedralization is complete, export the mesh from Salome-Meca and then convert it in Gmsh.
Salome-Meca
In Salome-Meca, right-click the mesh and select Export Mesh.
Export the mesh as either
GMForMED.Close Salome-Meca once the export is complete.
Gmsh
Open Gmsh.
Click File > Open and load the exported mesh.
Click File > Export and export it as an
.mshfile.When exporting from Gmsh, choose Version 2 ASCII.
Drag and drop the resulting
.mshfile into your Unity project’sAssetsfolder.
Note
Salome-Meca and Gmsh are only used to prepare the tetrahedral mesh. Once the .msh file
is imported into Unity, you can continue with the normal Mesh Deformations workflow.